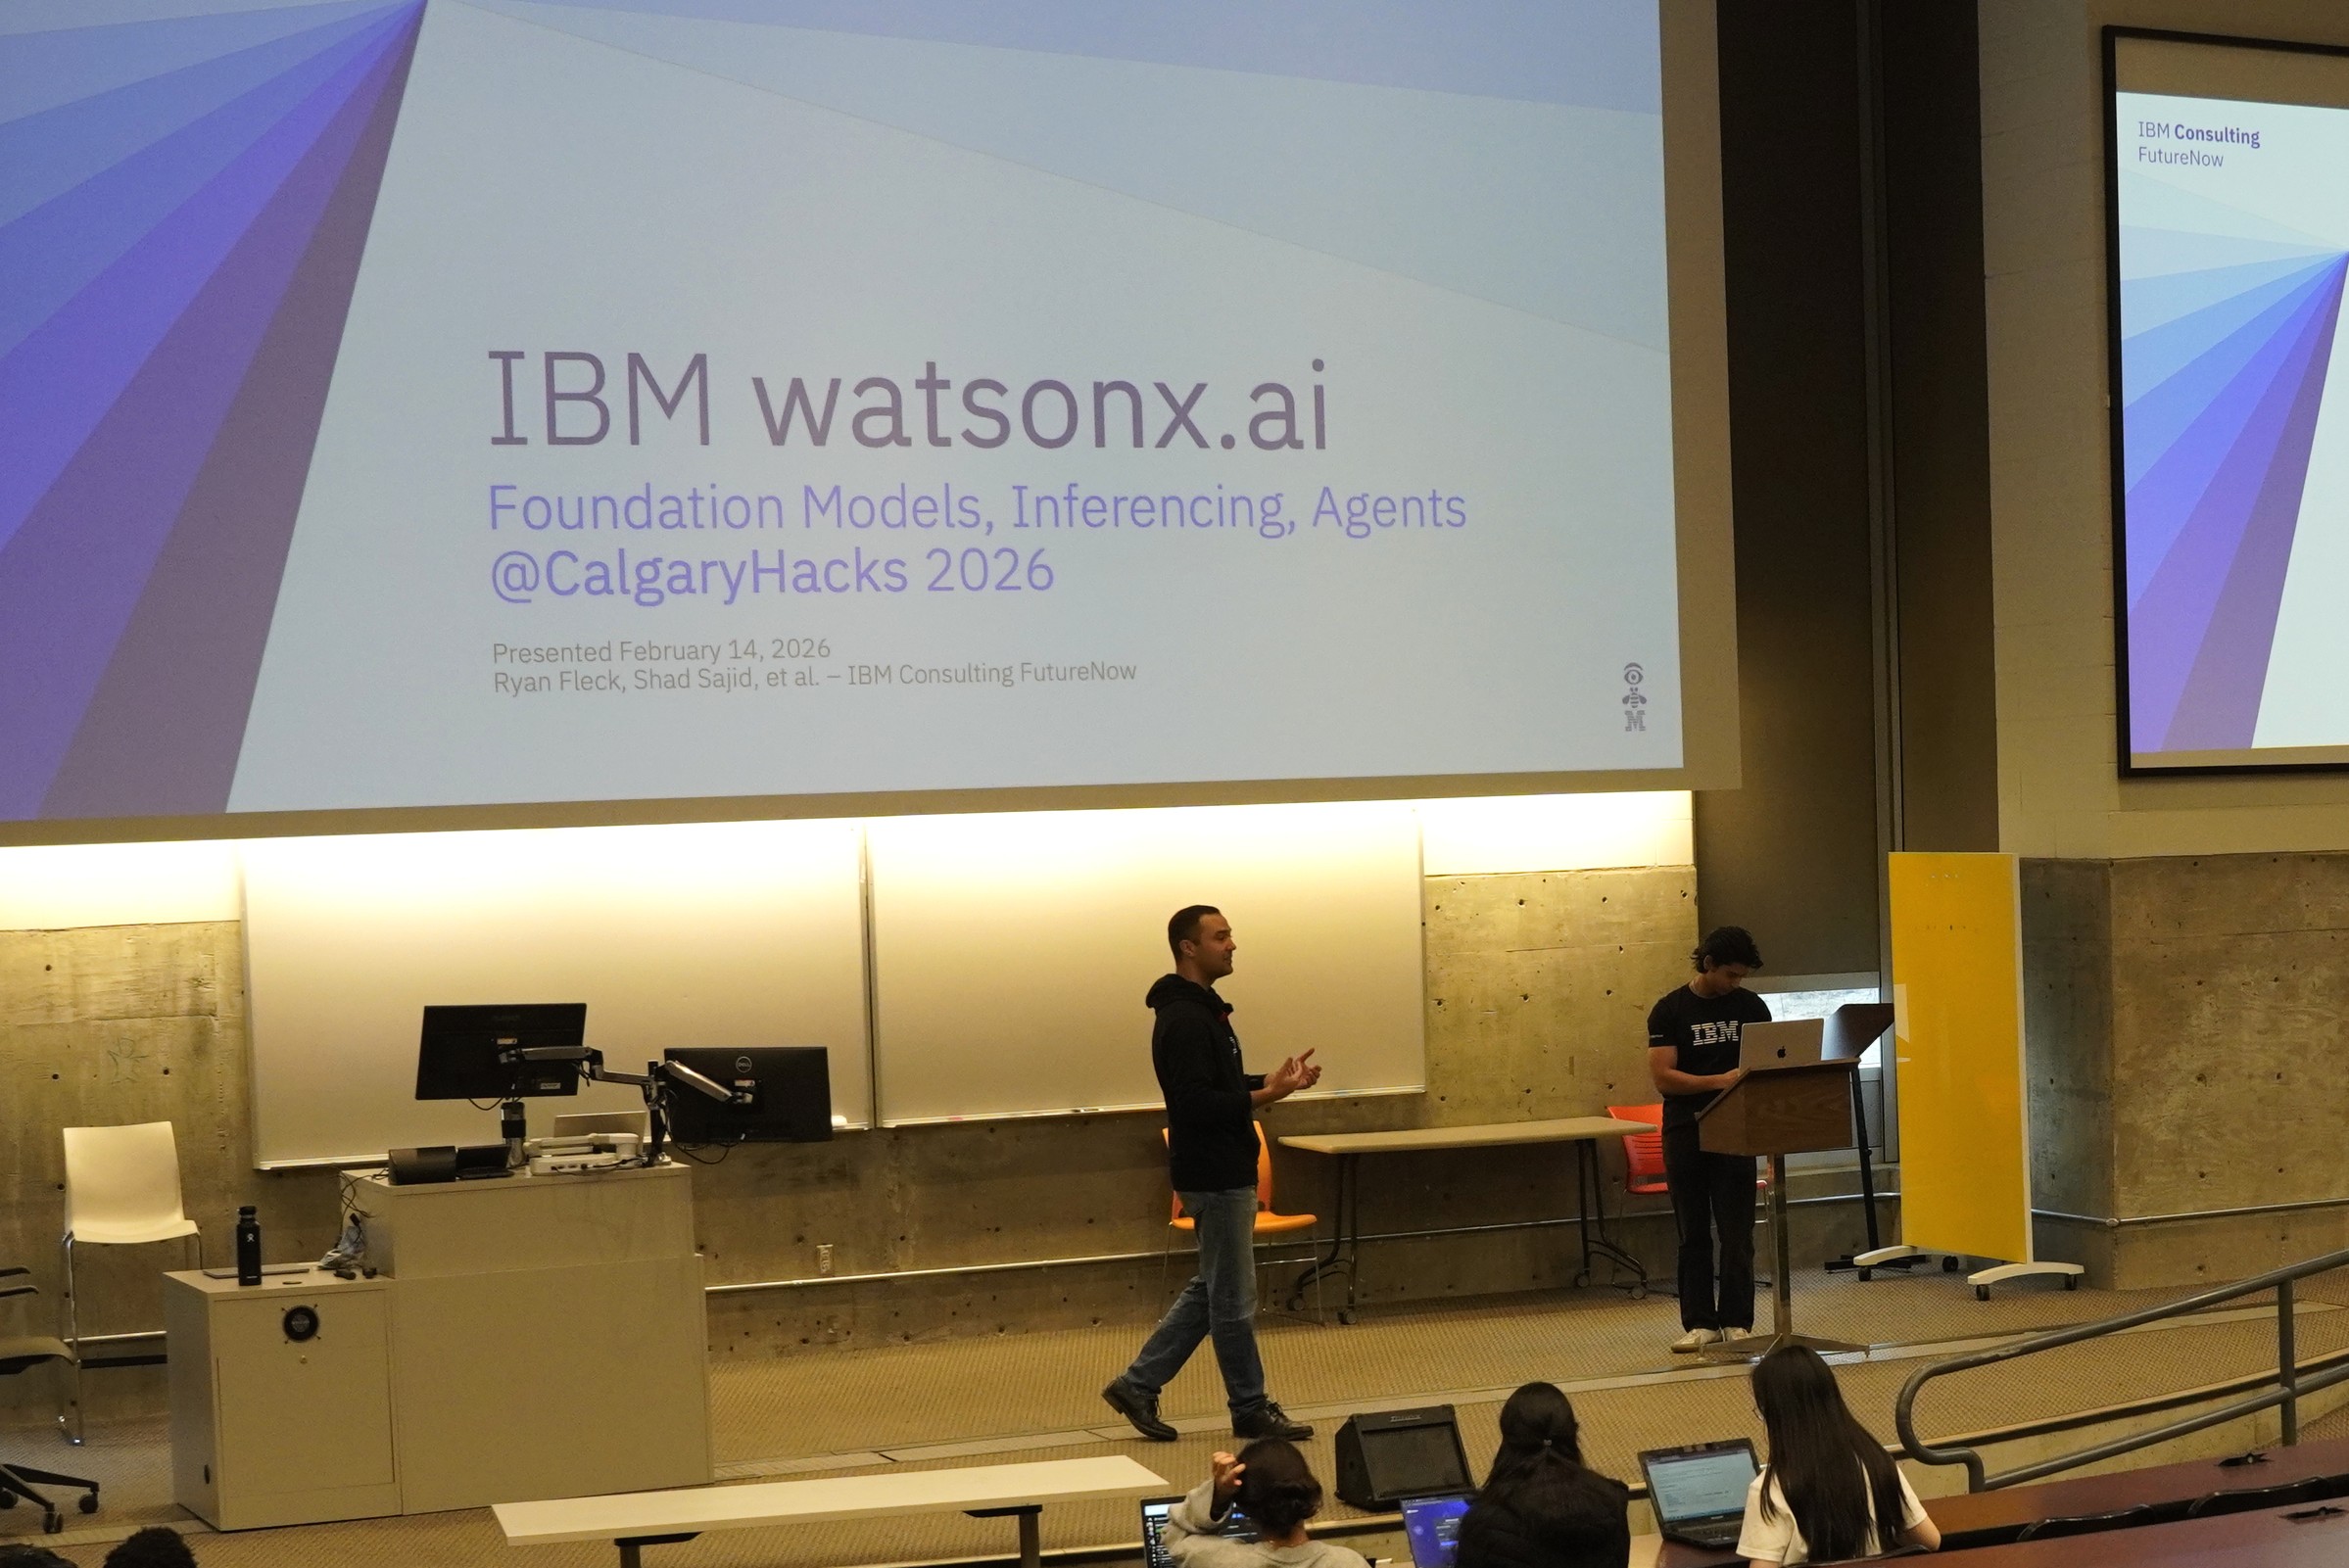
watsonx.ai is a part of the IBM watsonx suite of generative
AI tools. This tutorial will cover the basic setup and calling of the
watsonx LLM APIs to inference, call tools, and build agents! Join us
live at CalgaryHacks 2026 apply this powerful suite of tools to
power your hackathon submission.
“Ready to supercharge your hackathon build? Join our high-impact “Getting Started With watsonx” workshop at CalgaryHacks 2026 and learn how to harness IBM watsonx.ai, IBM’s enterprise-grade generative AI platform.
In just one hour, you’ll get hands-on experience with powerful foundation models, connecting to them using Python and LangChain to chat, call tools, and build agents. We’ll walk you through setup, free trial access, and practical patterns you can use as a foundation for your project. This workshop will give you the tools, credits, and support to add serious agentic firepower to your hackathon submission.
The ~$270.00 in IBM Cloud credits you will receive can also be used for spinning up containers or advanced services and includes free relational and document databases to power your hack.
Please come prepared with Python 3.11 or higher installed on your machine, and happy hacking!
– Ryan, Shad, and the IBM team”
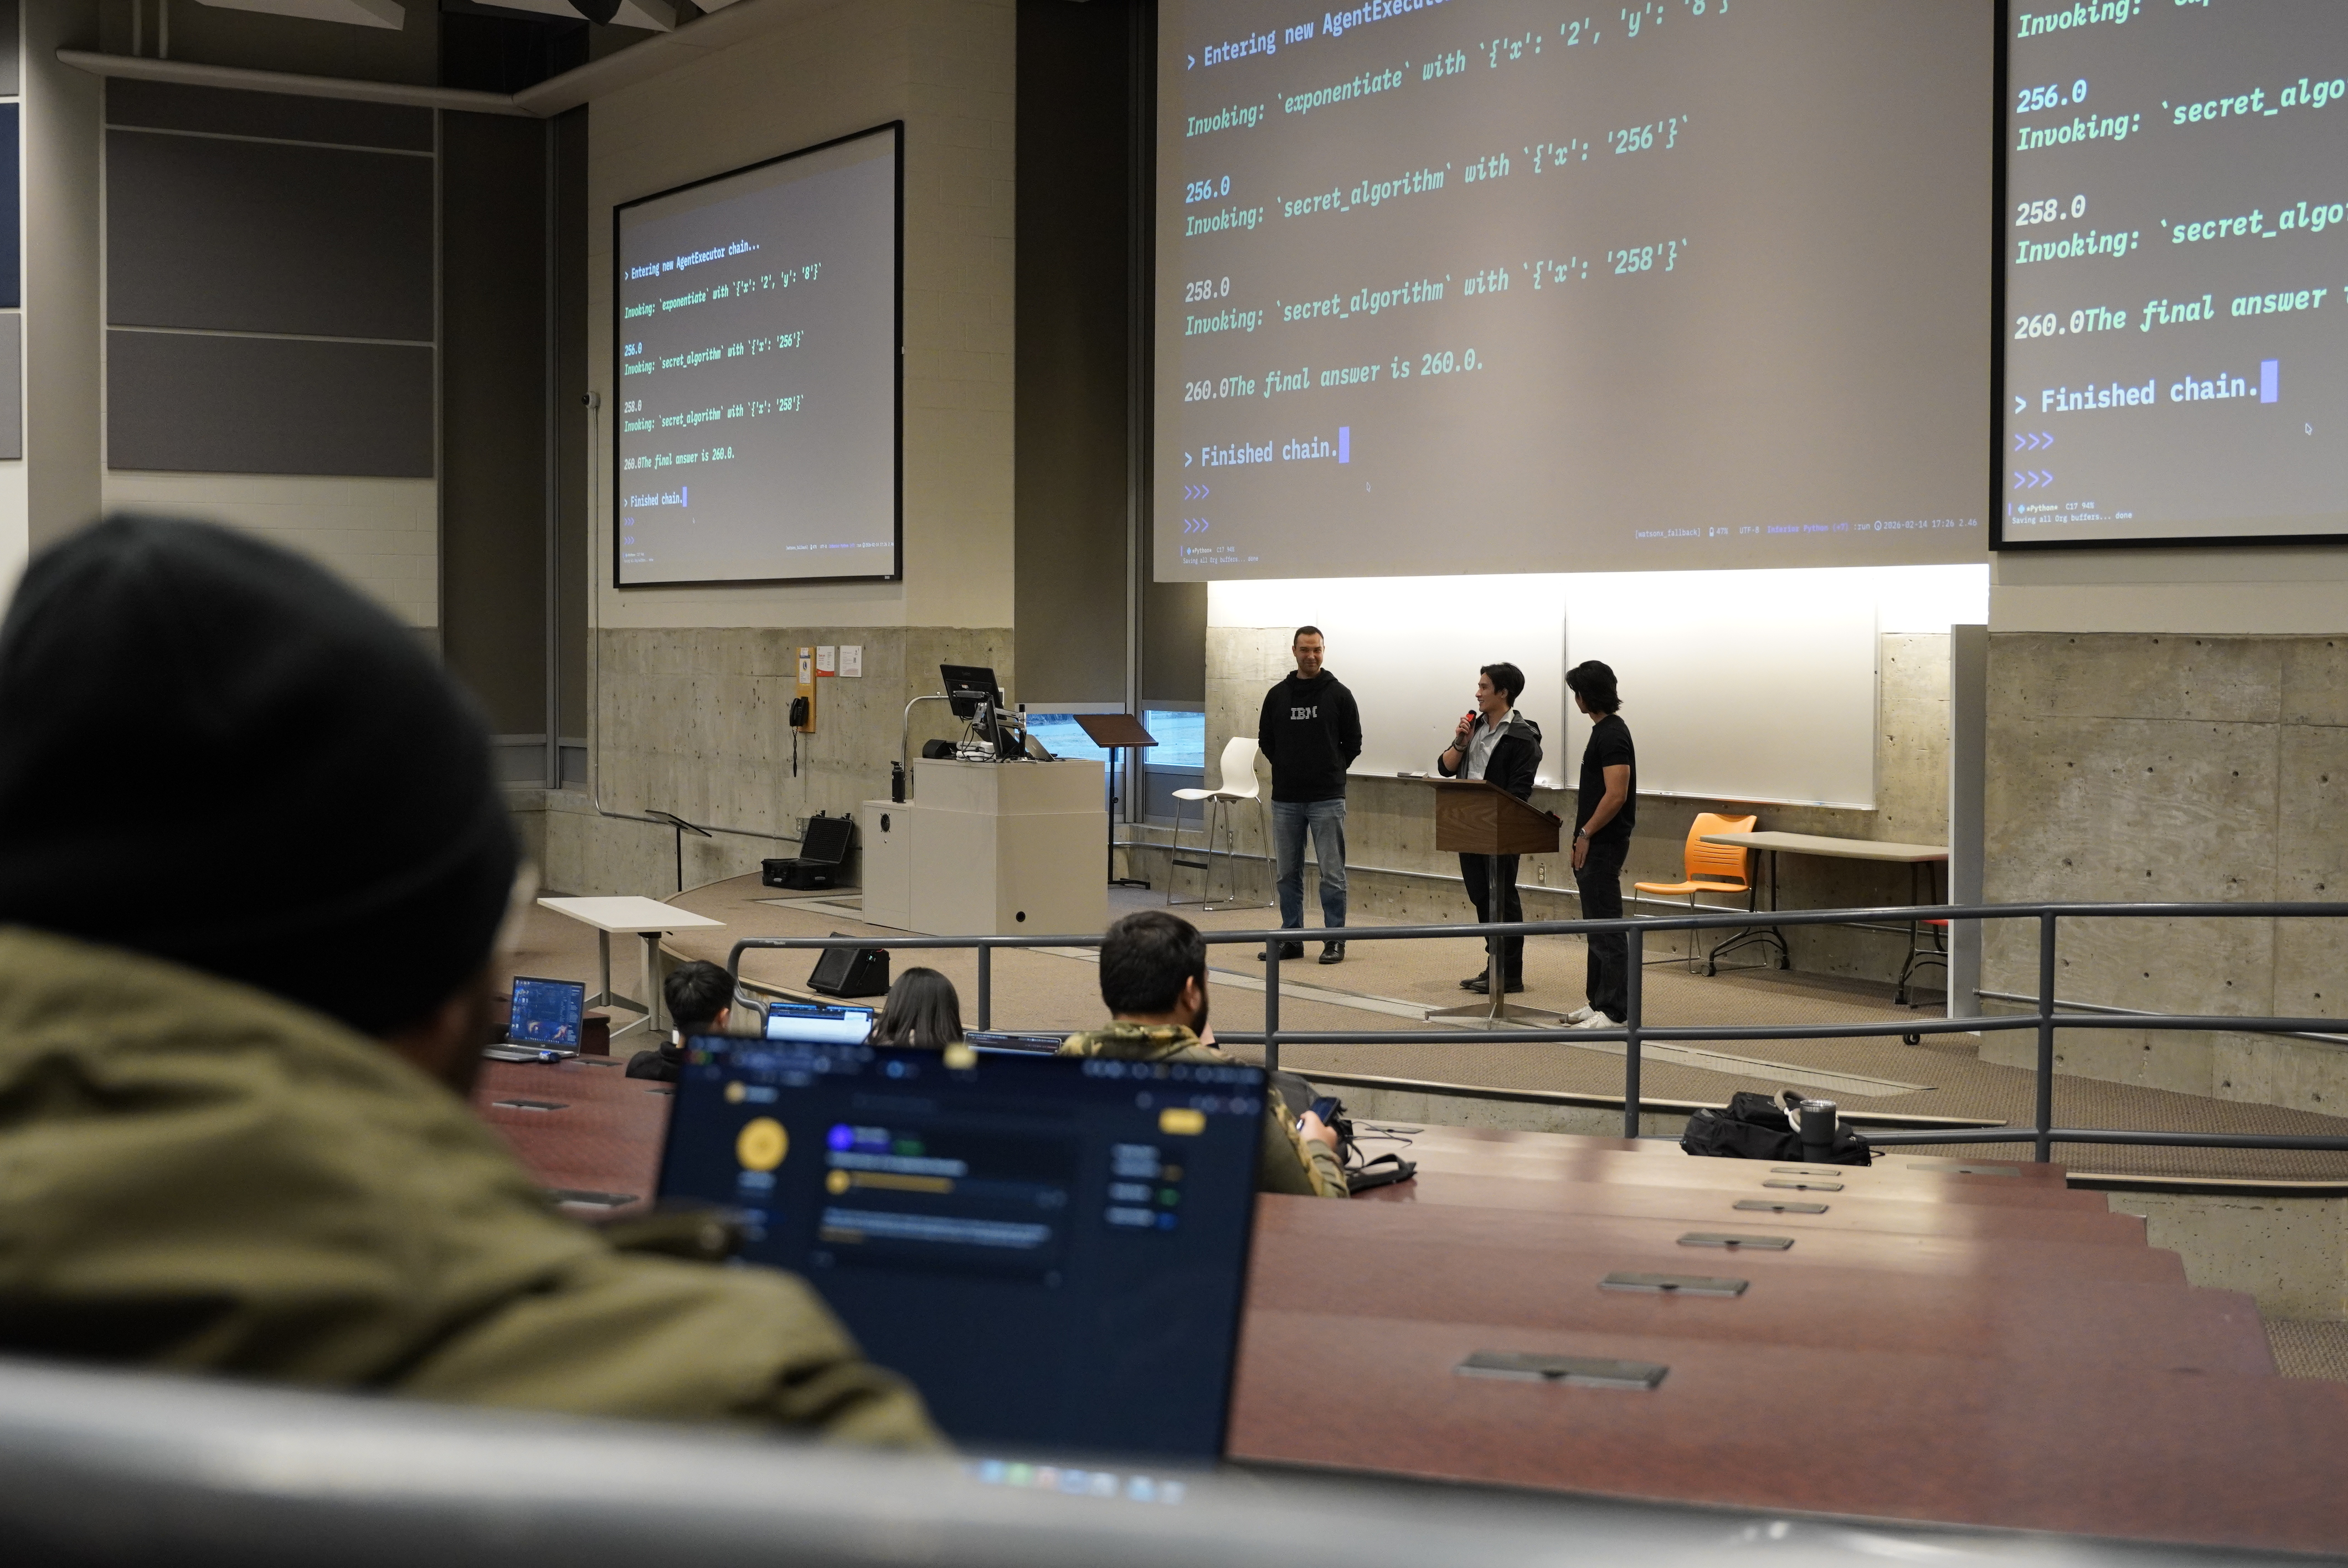
Thank-you to all our in-person participants!
Fine Print: This tutorial is a personal publication presented at CalgaryHacks 2026, which I attended as an IBM representative. The materials, instructions, code samples, and opinions provided here are my own and are shared for educational purposes only. This content does not constitute official IBM documentation or training material. All sample code is provided “as is,” without warranty or guarantee of support. IBM trademarks and product names are the property of their respective owners and are used here for identification purposes only.
Navigation Aid
This lengthy article has a button in the top-right corner of the page to quickly jump back to the Table of Contents.
It looks like this ToC
Workshop Goals
During this one-hour period we will accomplish:
- Inform you about
watsonx.aiand how you can use it in your hack - Get everybody free trial access to
watsonx.aihosted foundation models - Familiarize the audience with accessing the model via LangChain/Python
- Provide alternative methods to access the
watsonx.aiservice
Please come prepared with the following knowledge:
- How to program in Python
- Computer science fundamentals
- How to install Python, Node.JS, etc
- (use asdf locally or replit.com for a cloud environment)
You will need a laptop and credit card to participate in this workshop
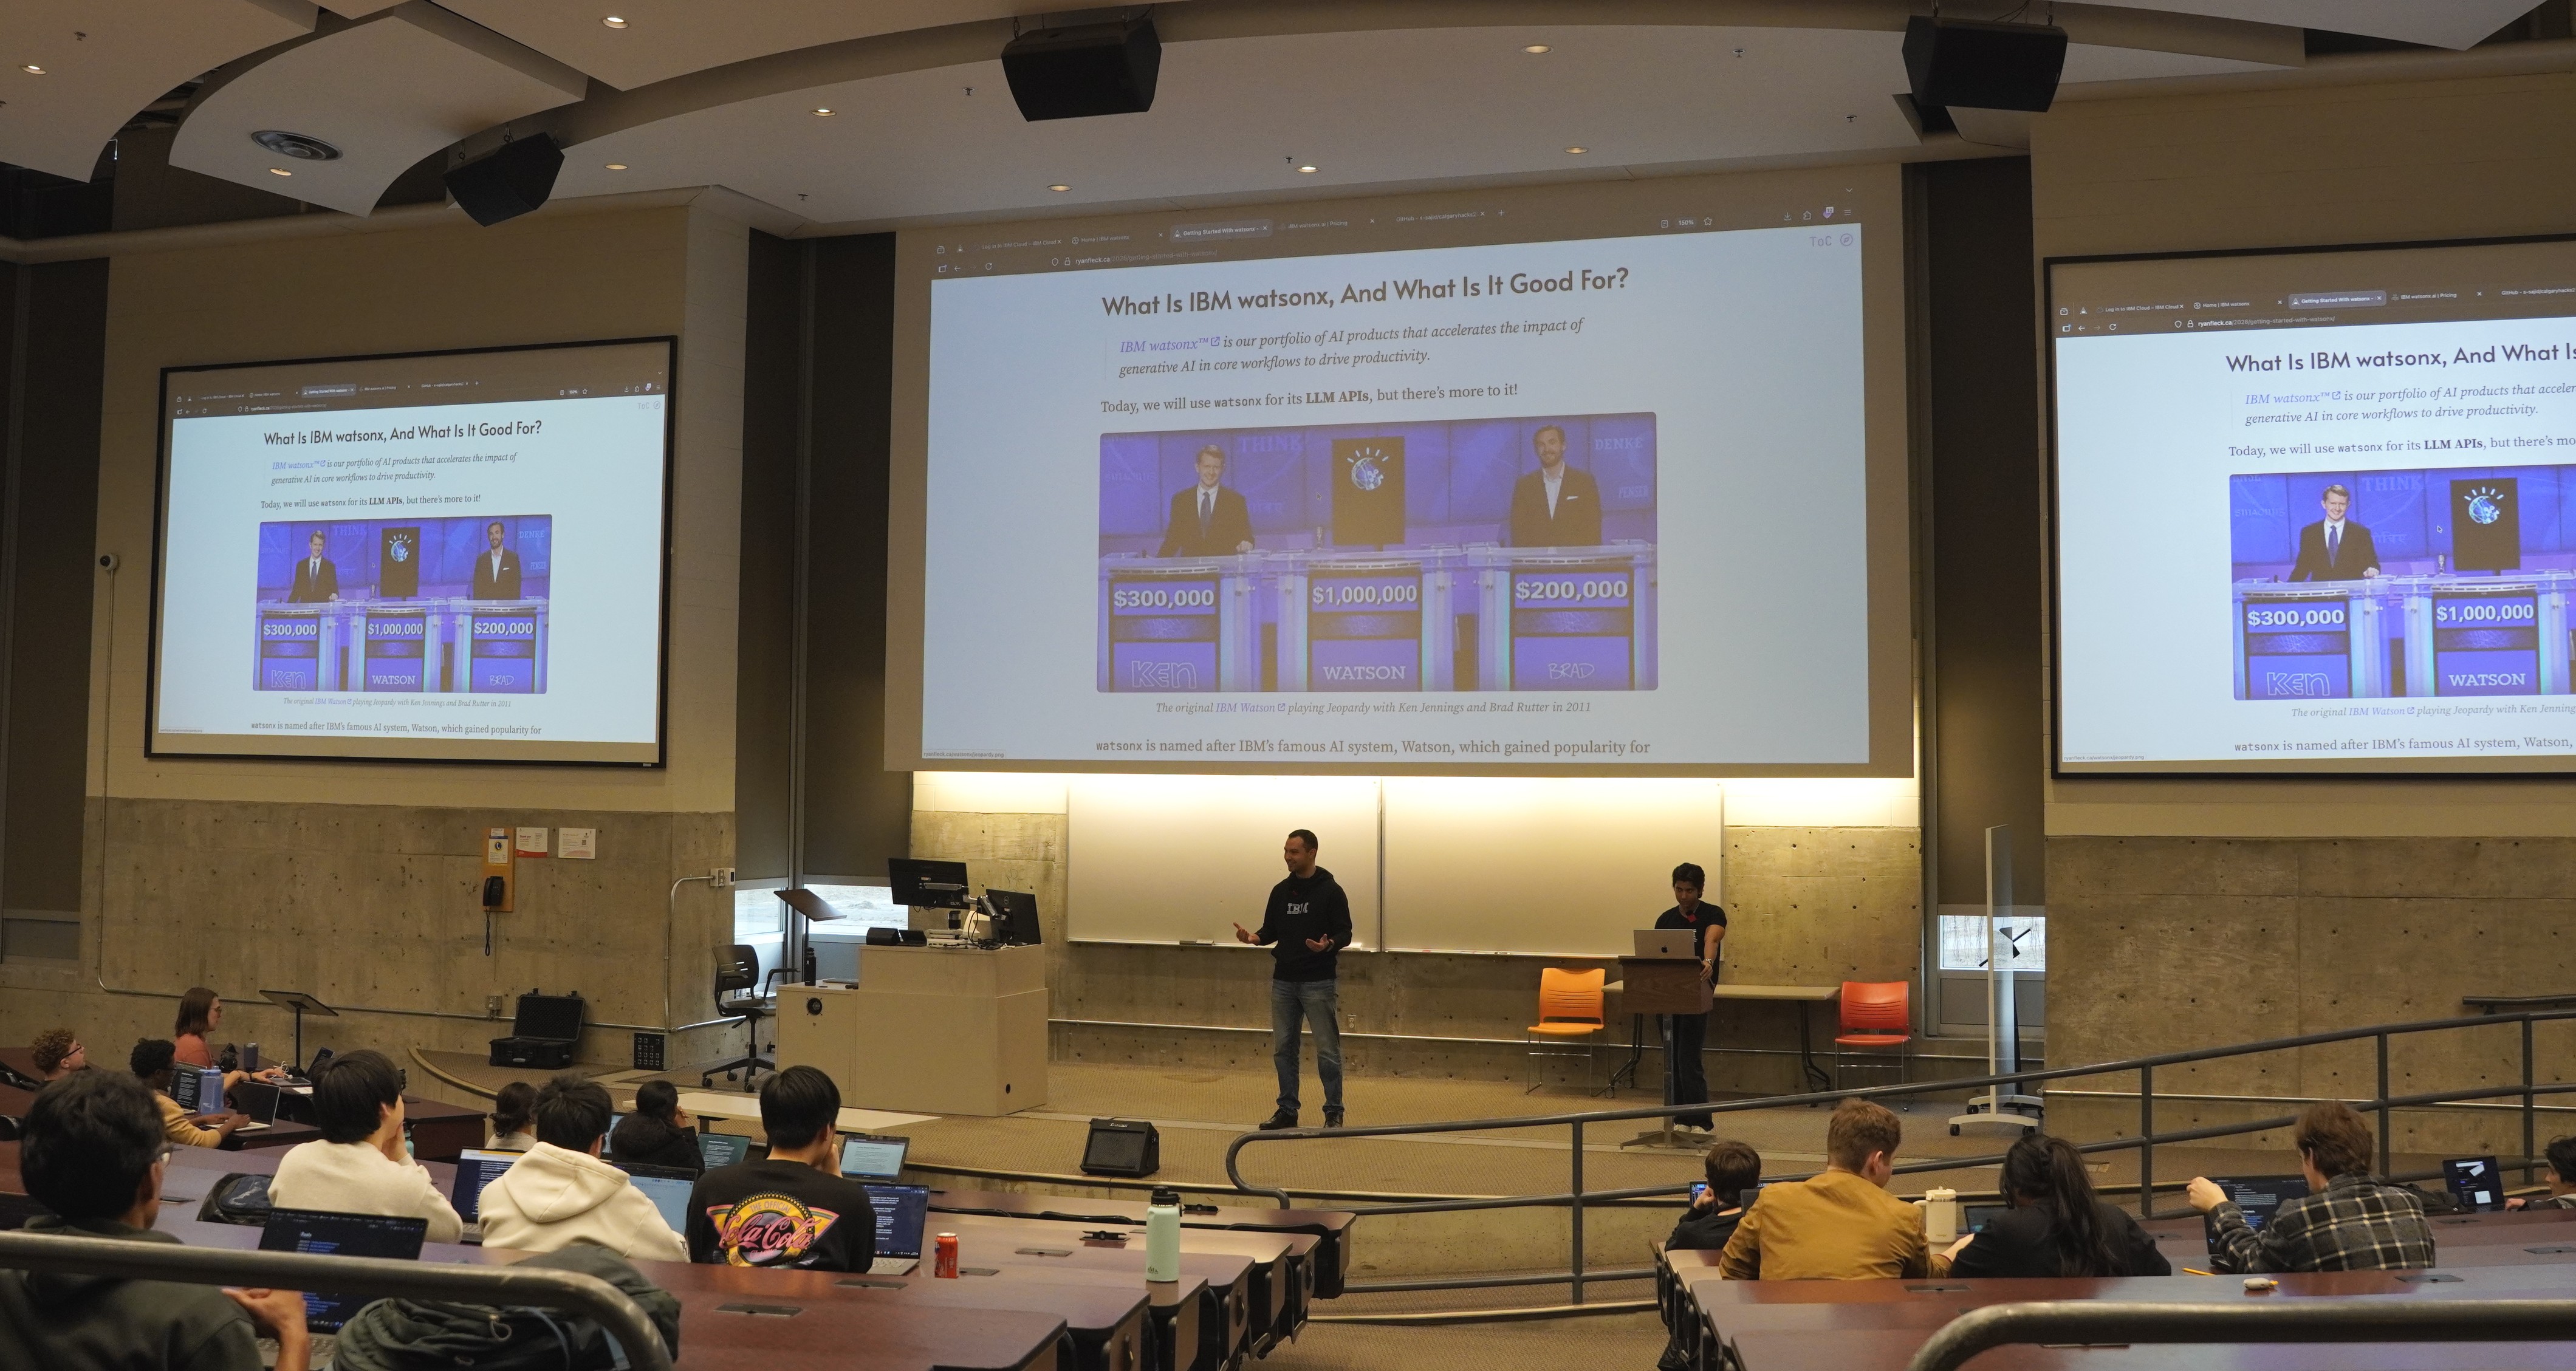
What Is IBM watsonx, And What Is It Good For?
IBM watsonx™ is our portfolio of AI products that accelerates the impact of generative AI in core workflows to drive productivity.
Today, we will use watsonx for its LLM APIs, but there’s more to
it!

watsonx is named after IBM’s famous AI system, Watson, which gained
popularity for its ability to answer questions and process natural
language. Watson was named after Thomas J.
Watson
, who worked at
IBM from 1914 to 1956 and is regarded as the man who turned IBM from a
tiny company into the model corporation of the 20th century. watsonx
builds on this legacy by offering a secure, comprehensive, and
user-friendly platform for developing, deploying, and managing AI
applications.
For the purposes of this tutorial, watsonx will be used to refer to
watsonx.ai, part of a larger portfolio of products. watsonx.ai
enables easy access to IBM-managed foundation
models
and
easy integration with RAG systems to provide essential document-driven
context for LLM responses.
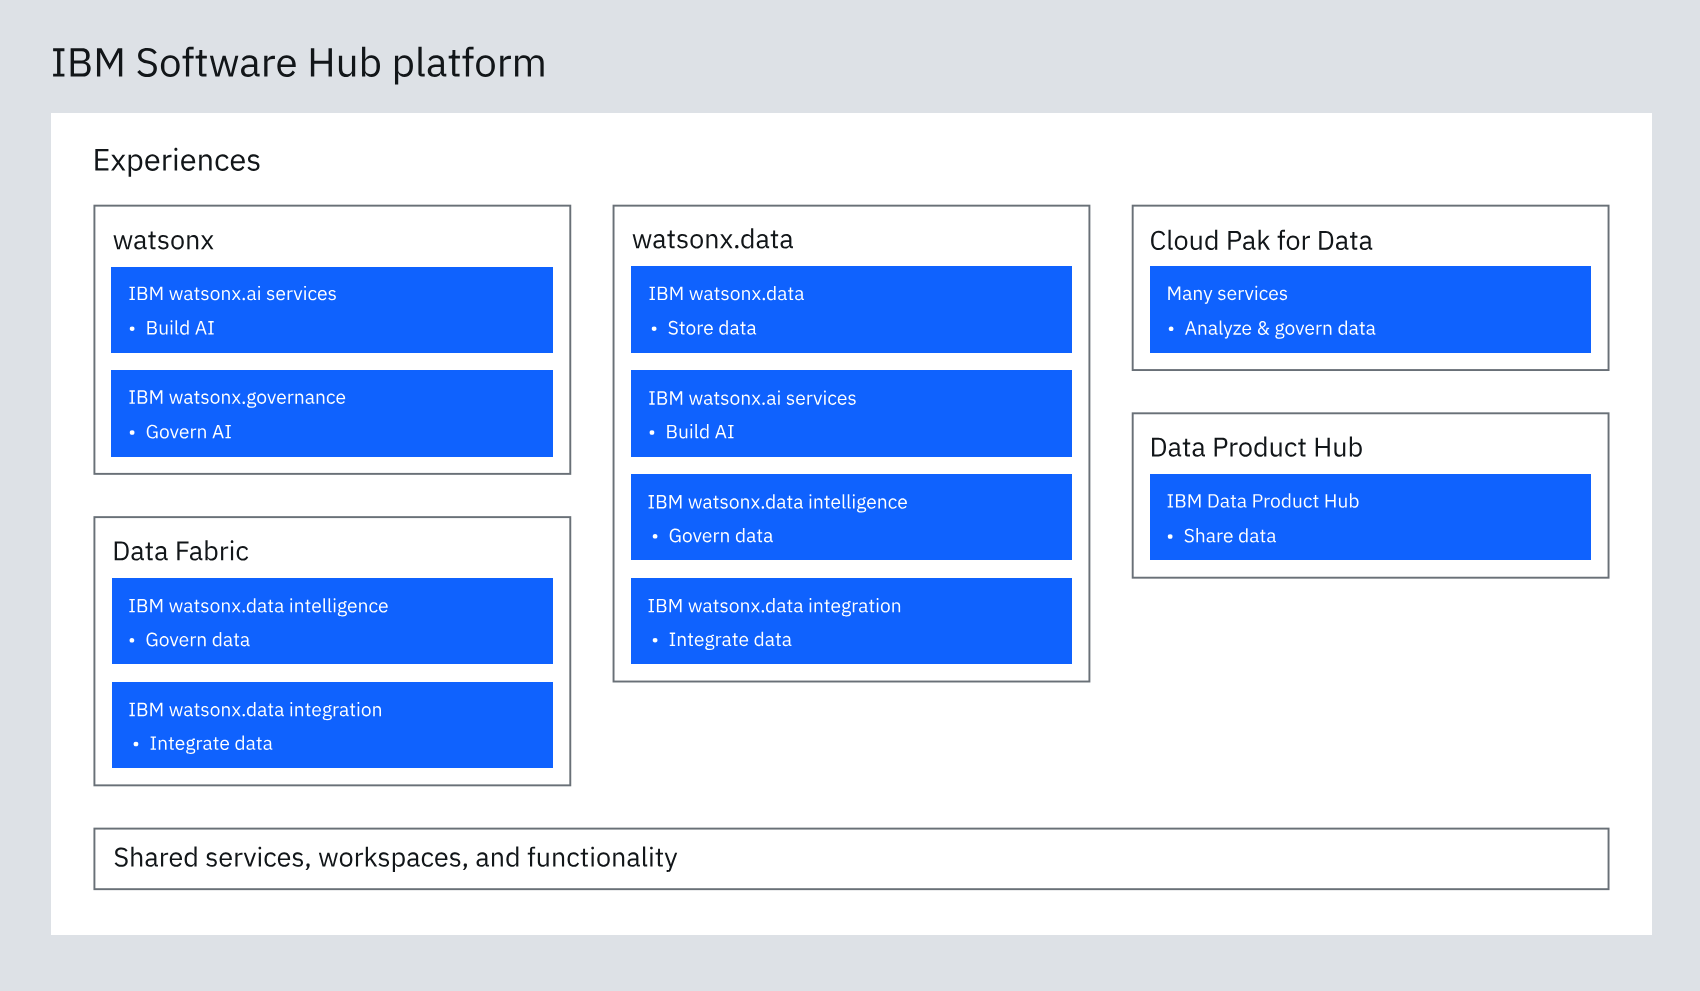
The full scope of watsonx products is huge, and leverages many
existing IBM products to create new offerings. You don’t need to worry
about any of these for the hackathon.
Here is an overview of the primary products, with several more not shown:
watsonx.ai - An enterprise-grade AI developer studio for building and deploying AI solutions
watsonx.data - The hybrid, open data lakehouse to power AI and analytics with all your data, anywhere
watsonx.governance - An end-to-end AI solution for lifecycle governance, risk and security management and compliance
You may also see the term CPD or Cloud Pak For Data in the
documentation. This refers to a set of services on the IBM Software
Hub for traditional data engineering and AI lifecycle tasks. It rests
alongside watsonx within the IBM Software Hub.
Other Useful IBM Cloud Technologies
IBM Cloud has a generous set of always-free offerings to use in your hackathon project including databases, data processing and NLP APIs, and more.
IBM Cloud account is a Pay-as-you-go account, which includes access to 40+ products (including IBM Watson® APIs) with a free tier. No fees or upfront commitments, cancel anytime. Only pay for what you use beyond the free tier
- 300K tokens of LLM inferencing with Mistral, Llama, and Granite
- 1GB of IBM® Cloudant® document database storage
- 200MB of IBM® Db2® SaaS relational database storage
- 1M characters through IBM Watson® Language Translator
- 1K API calls to IBM Watson® Personality Insights
- 500 minutes of IBM Watson® Speech to Text
- 10K characters of IBM Watson® Text to Speech
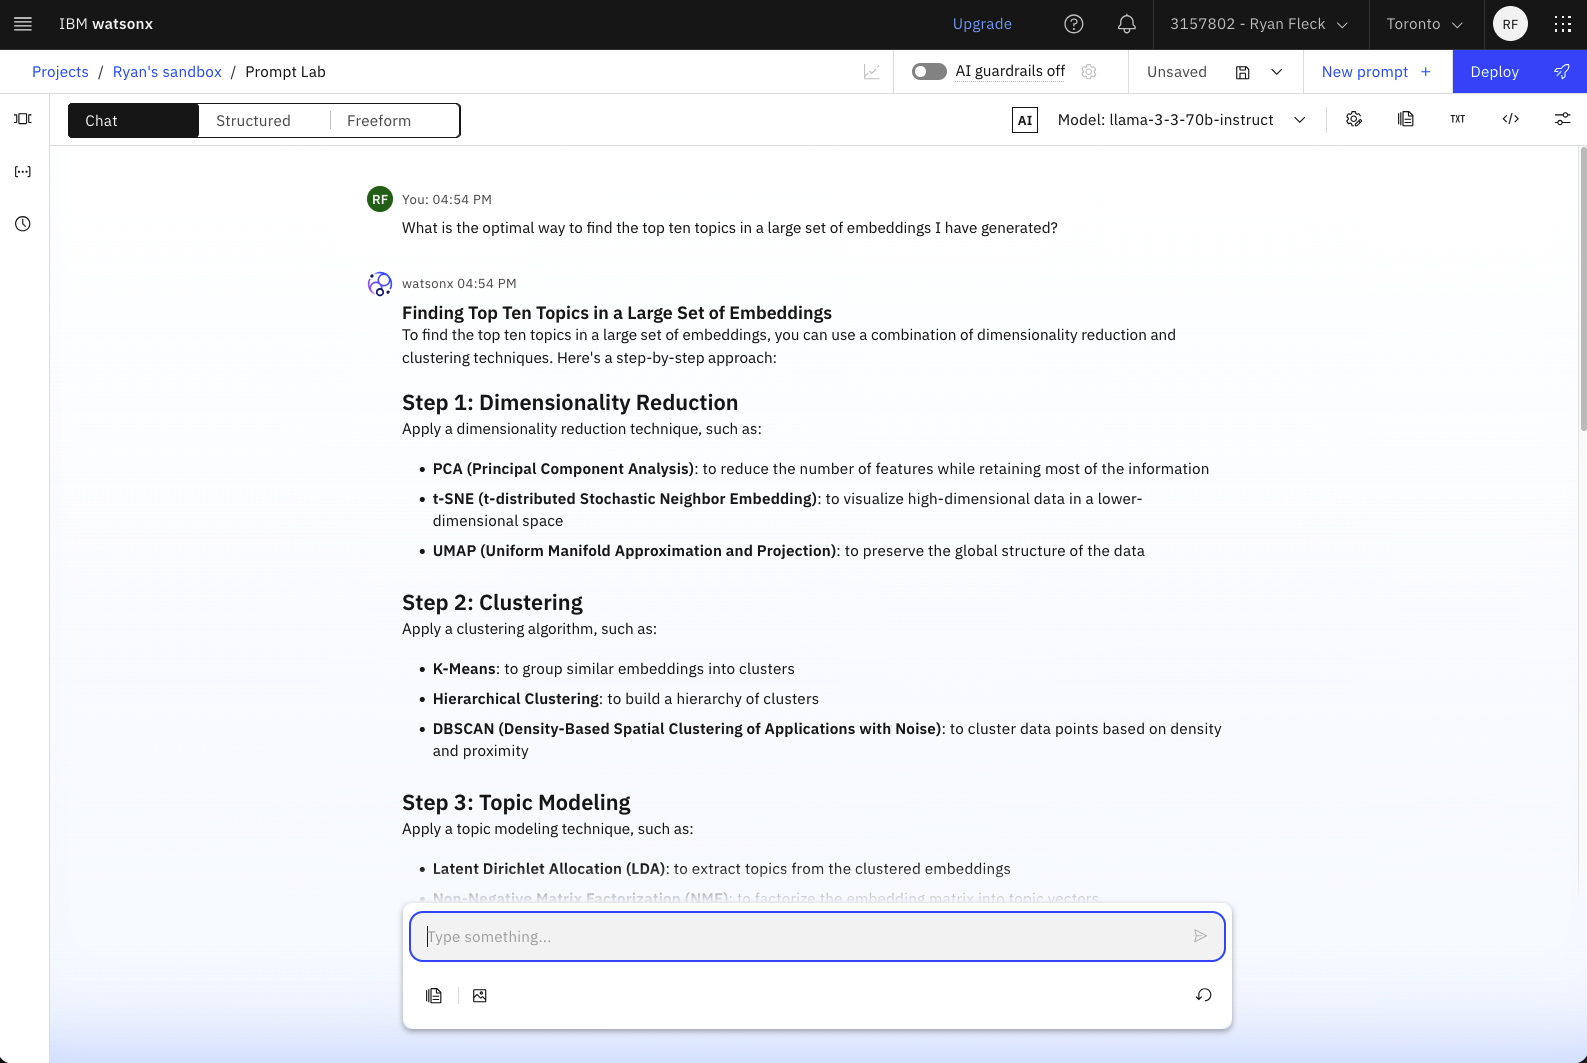
Accessing IBM Cloud and watsonx
The first step in our workshop is to create a project and API key in IBM Cloud.
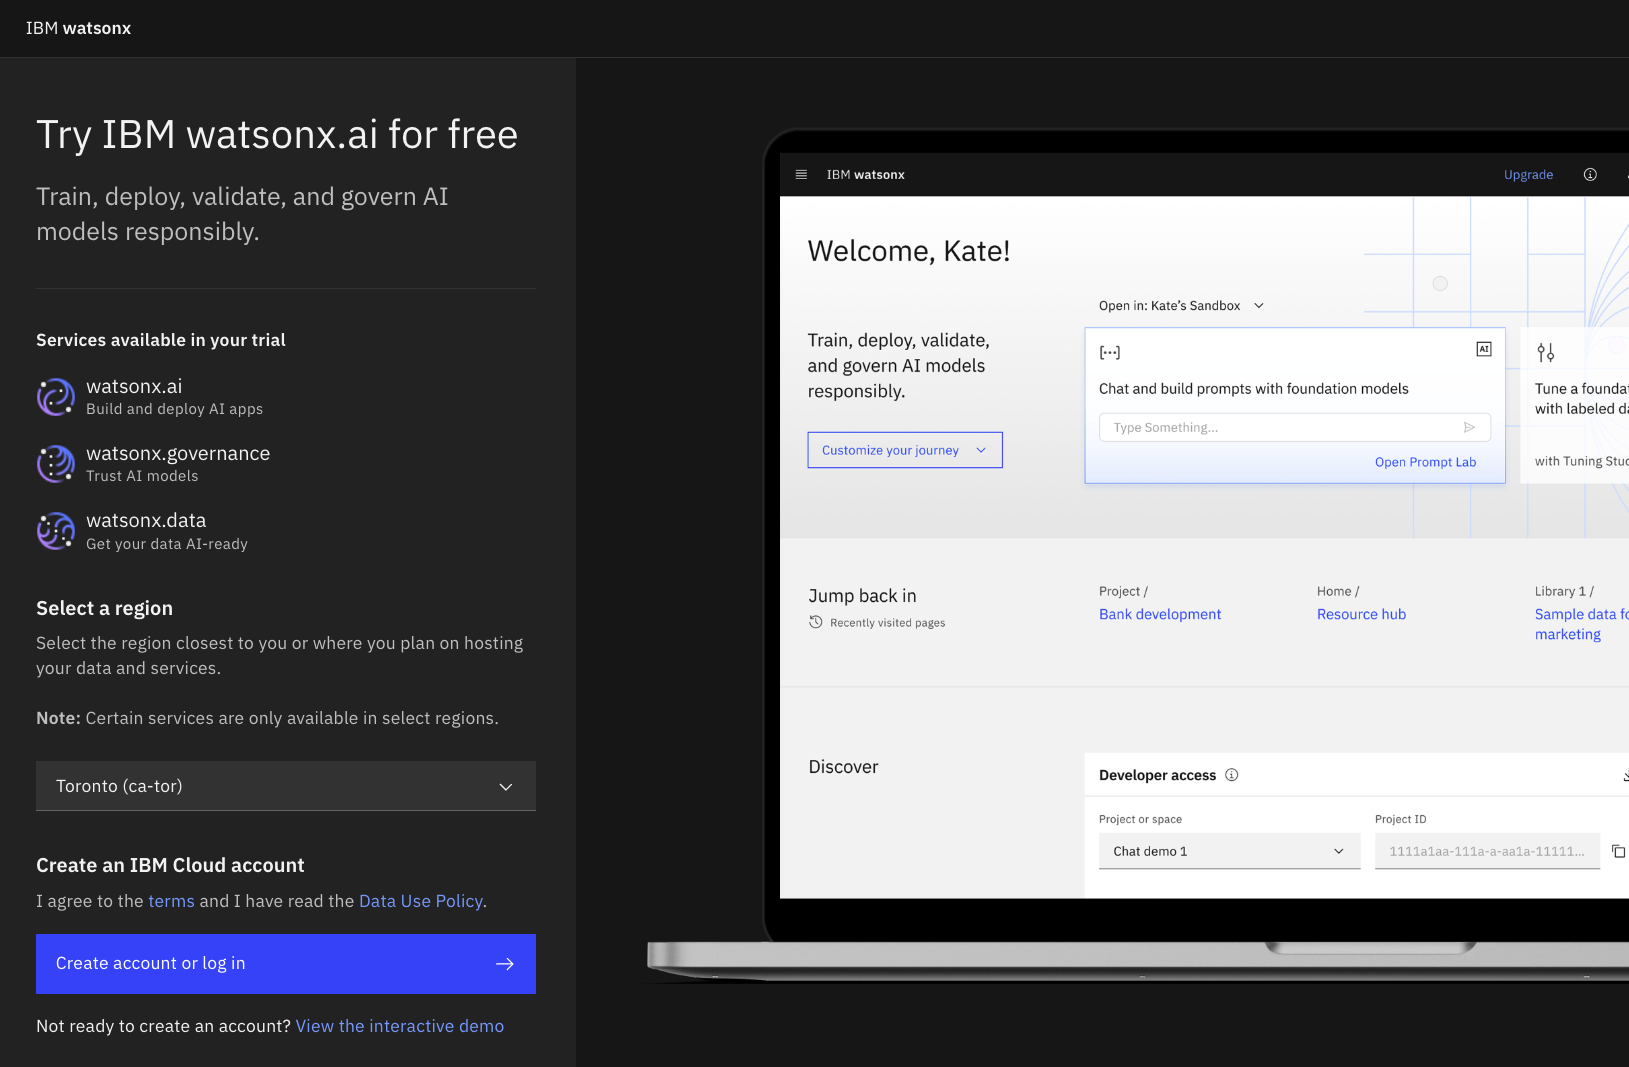
Open up this watsonx product page and start your free trial. Though it should be fairly intuitive, here is a set of screenshots to guide you through the process, with details provided where appropriate.
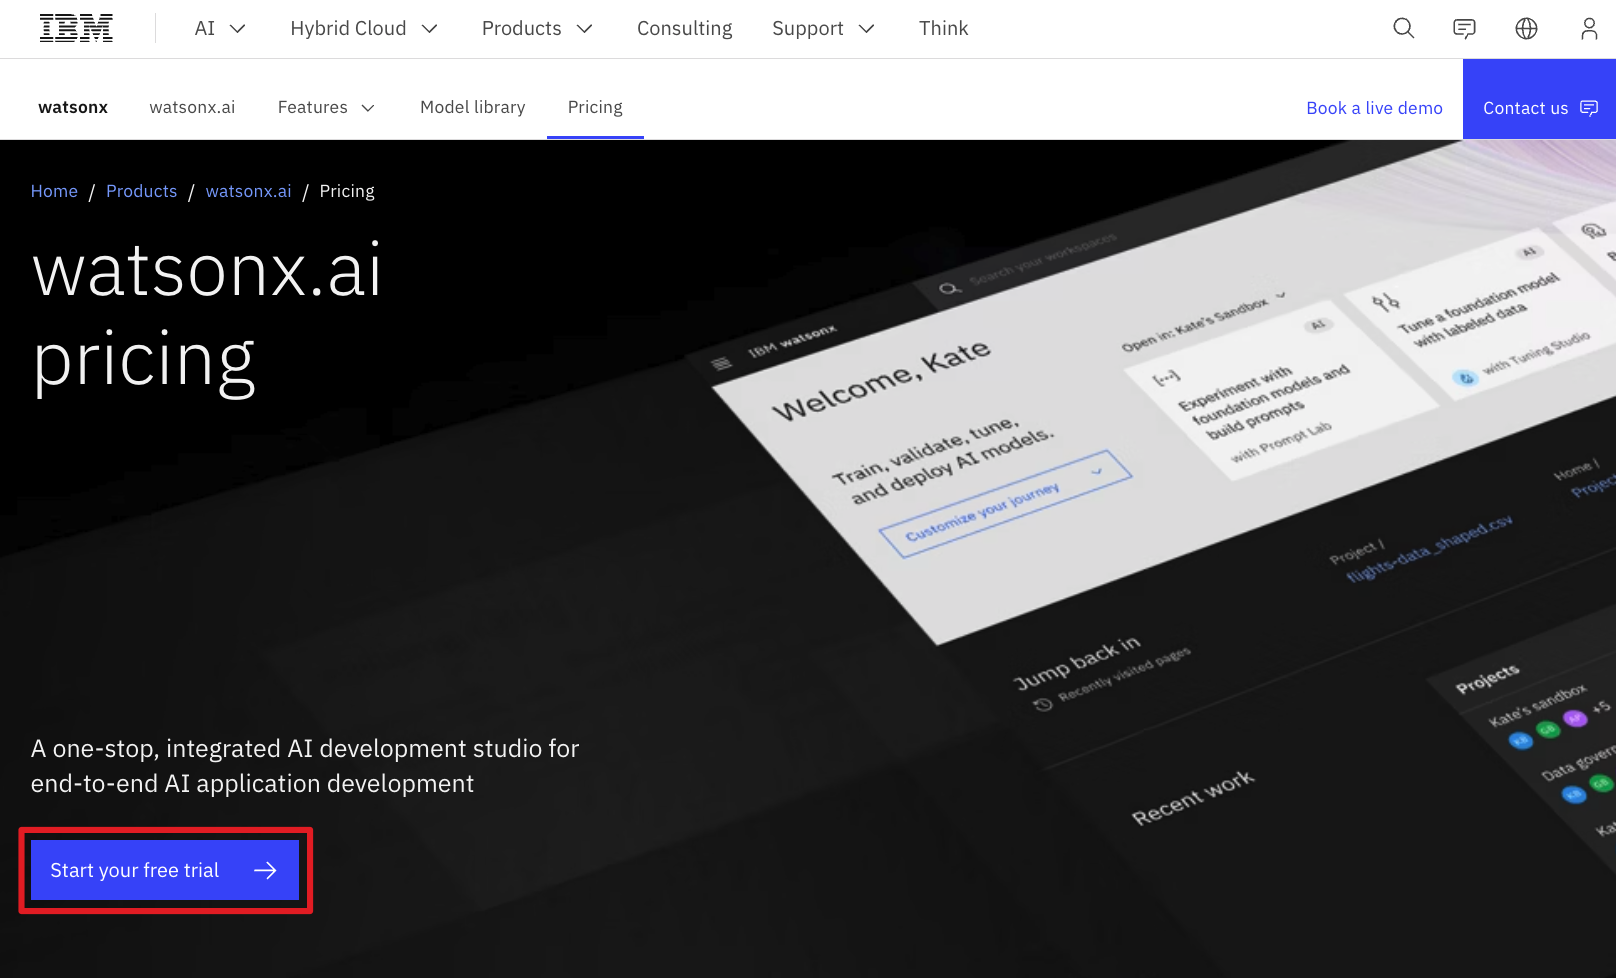
Create an account in the Toronto (ca-tor) region.
Provide an email, personal details, and a credit card.
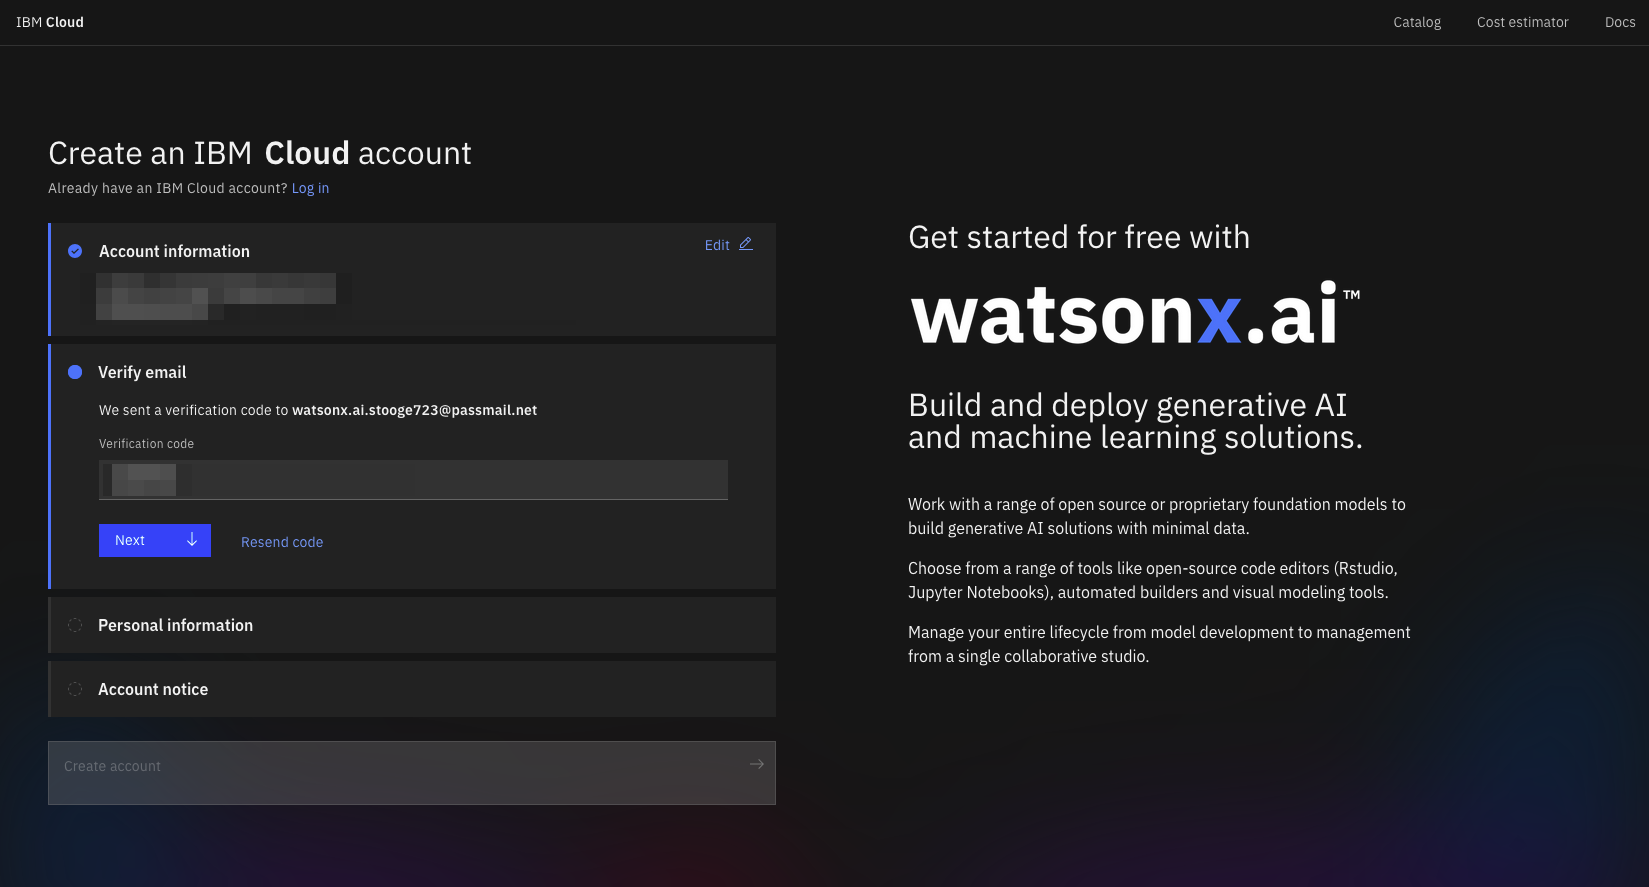

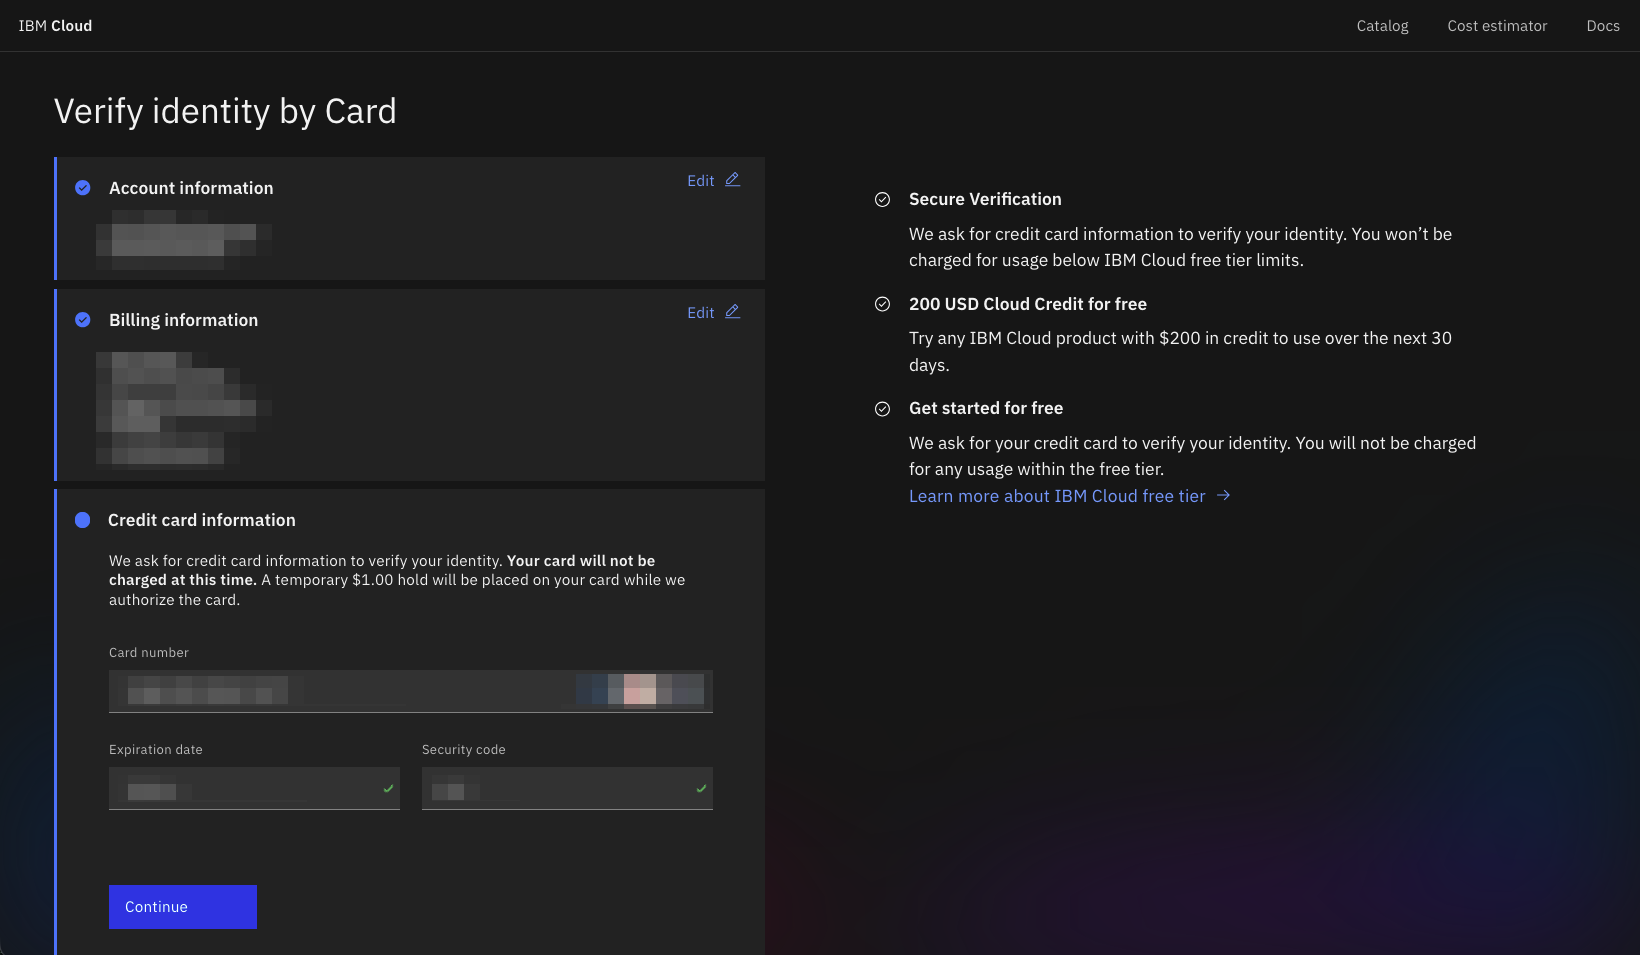
You may need to set up the IBM Verify app for 2FA.
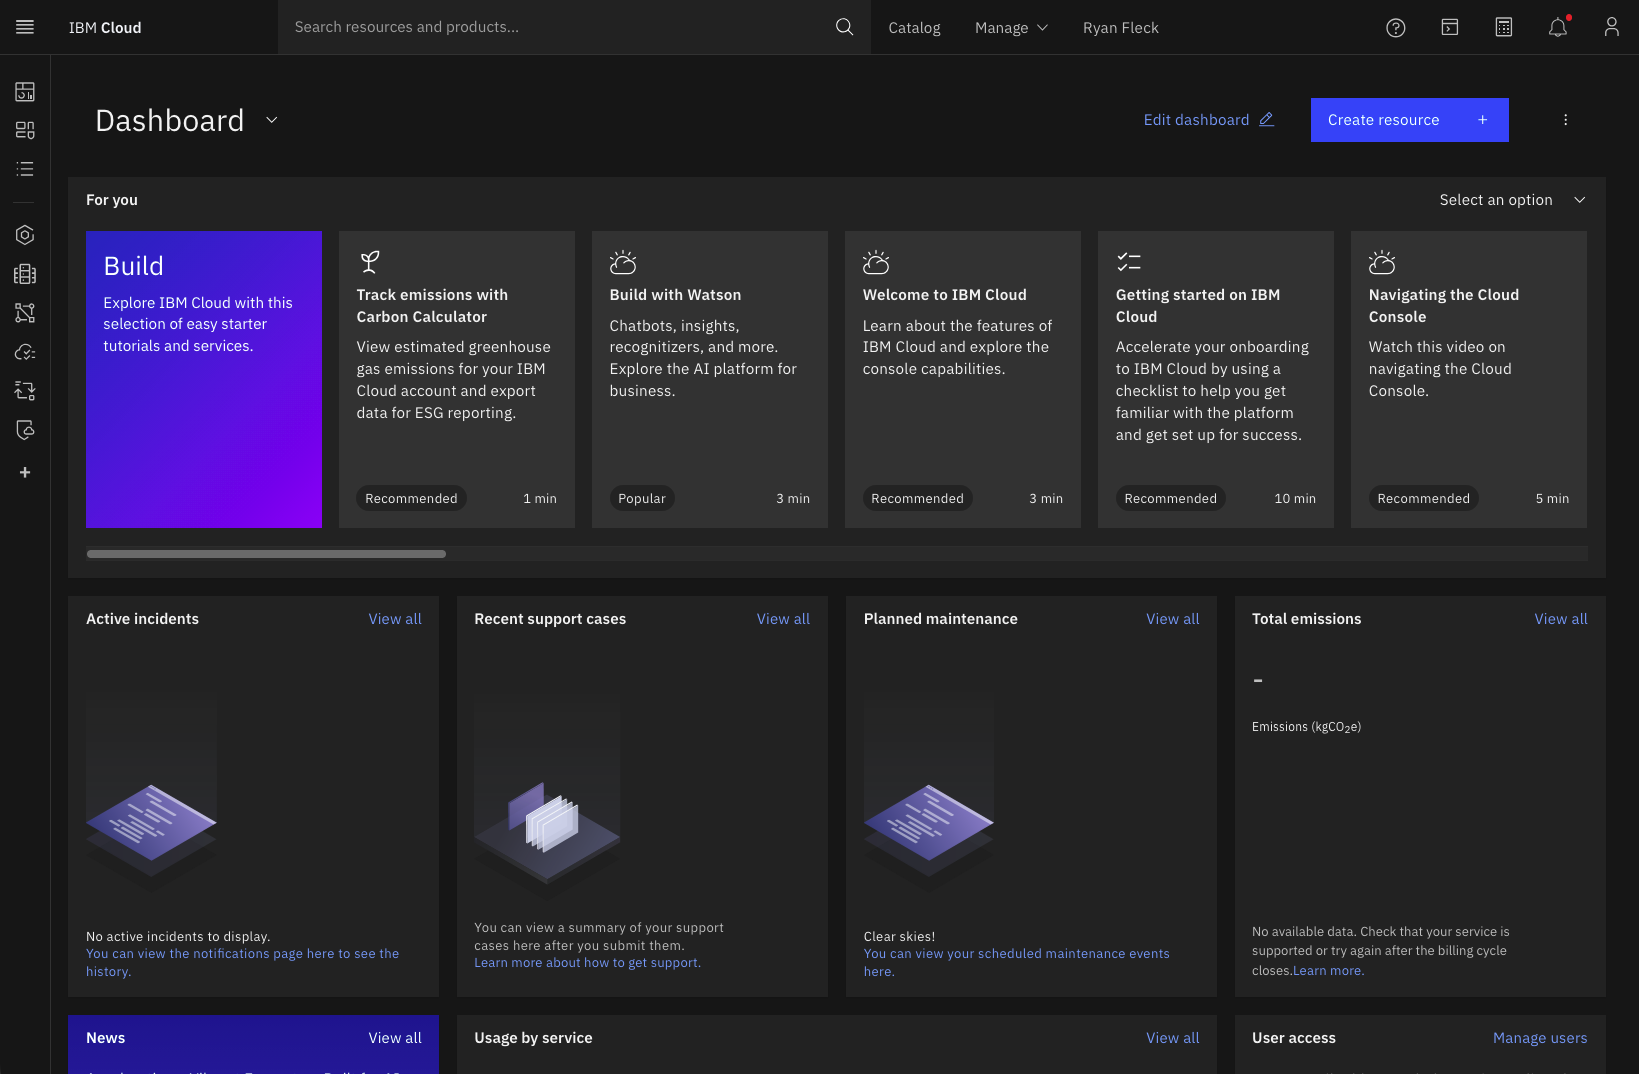
When you gain access to IBM Cloud you will be greeted with this view. From here, search for “watsonx” to bring up the landing page for the service.
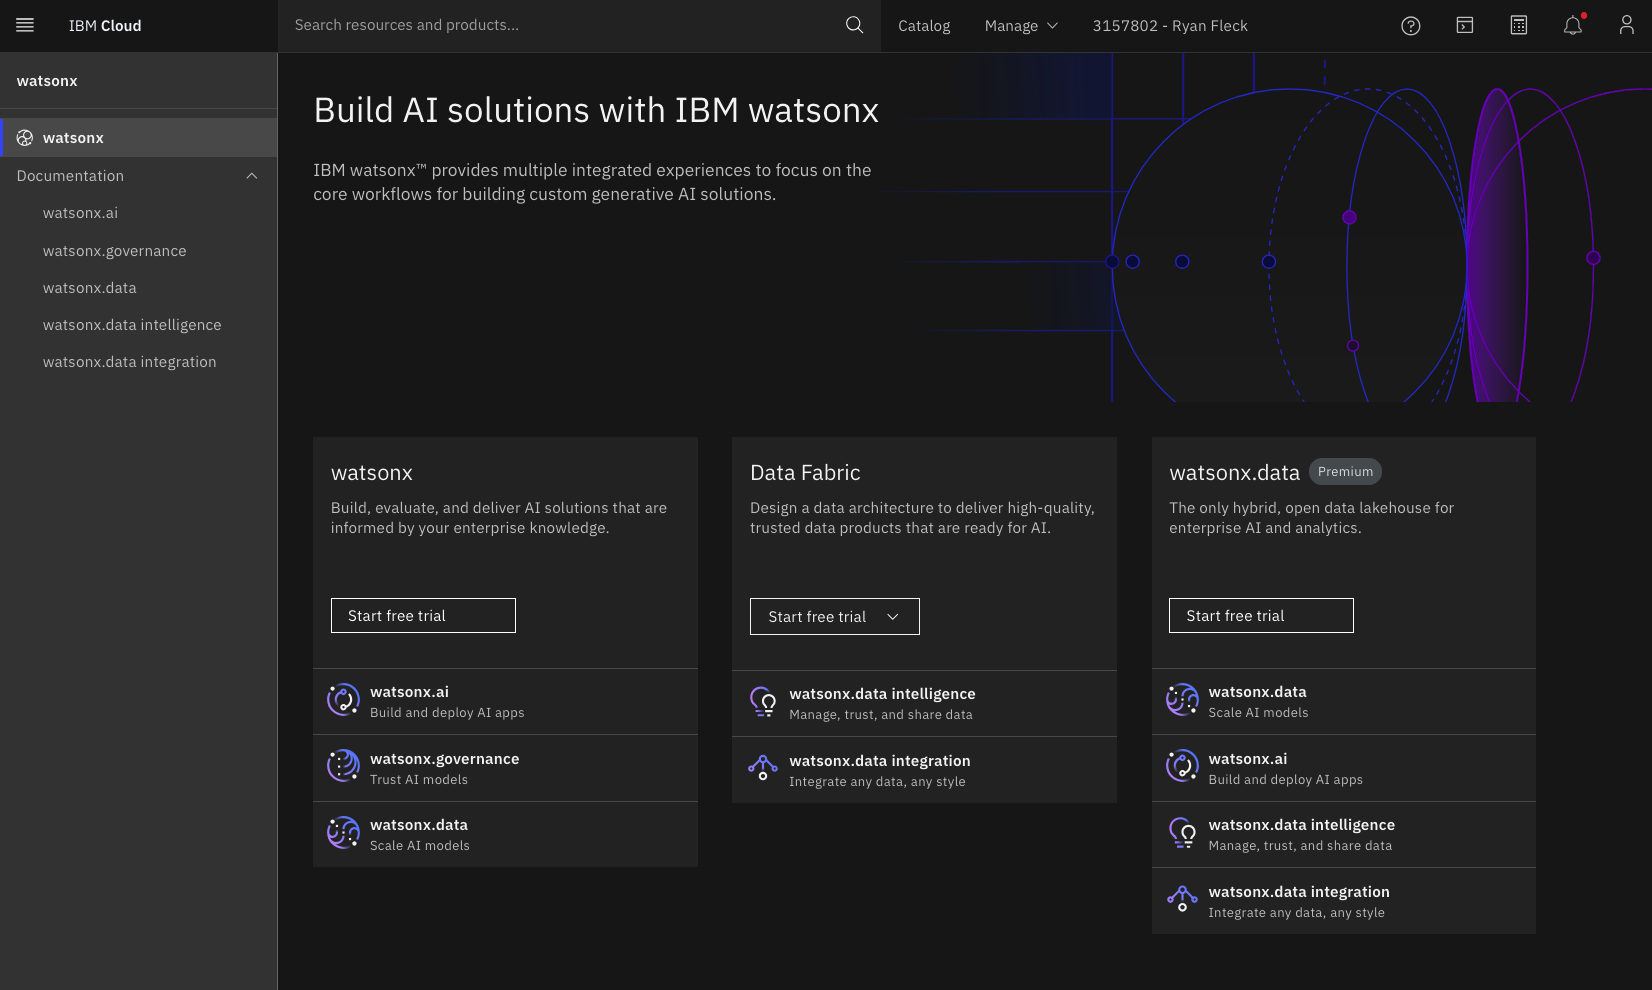
watsonx and start the free trial
watsonx
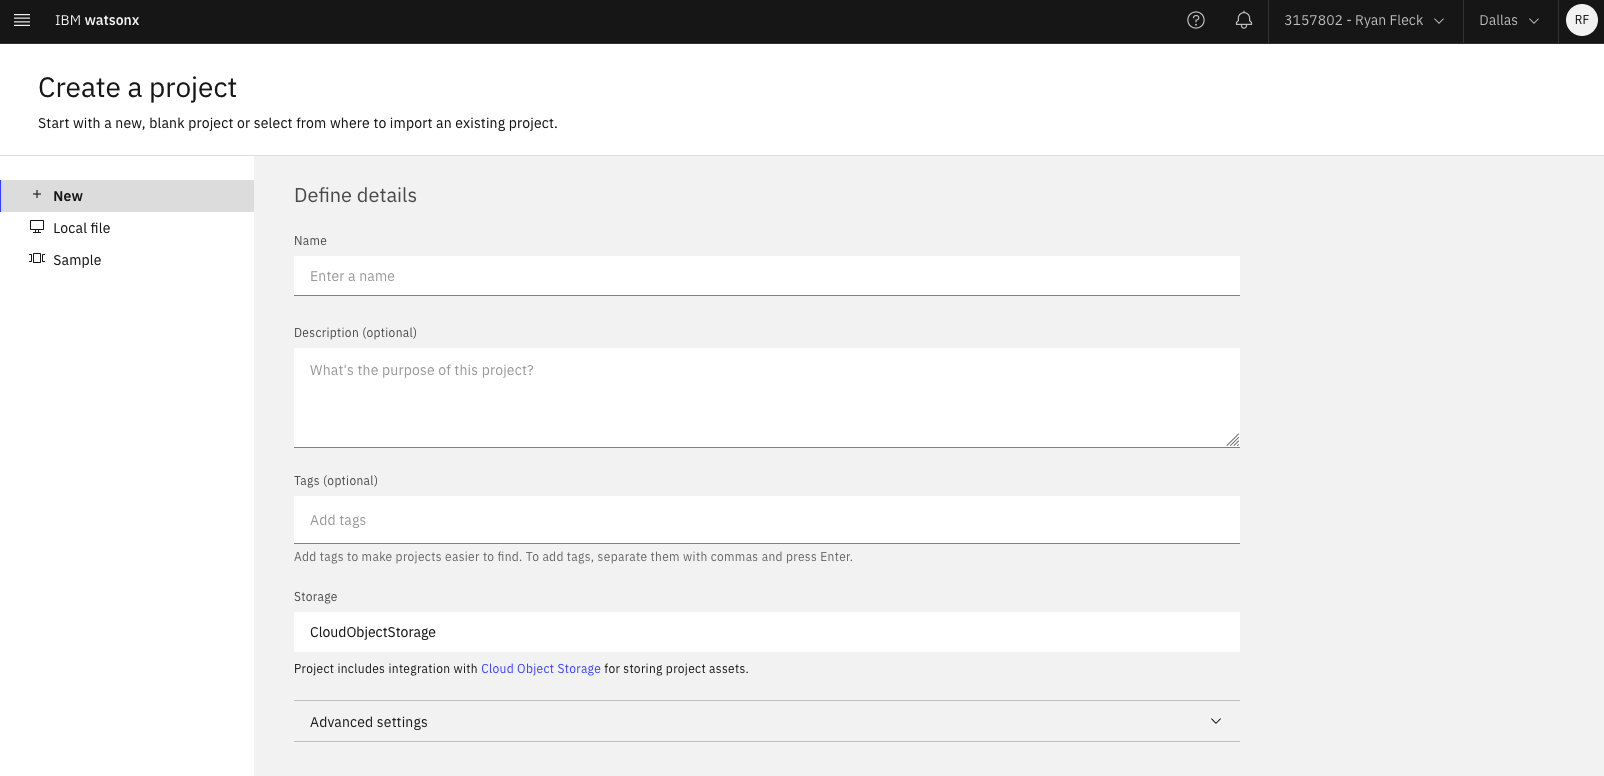
When you gain access to watsonx, create a project and api key.
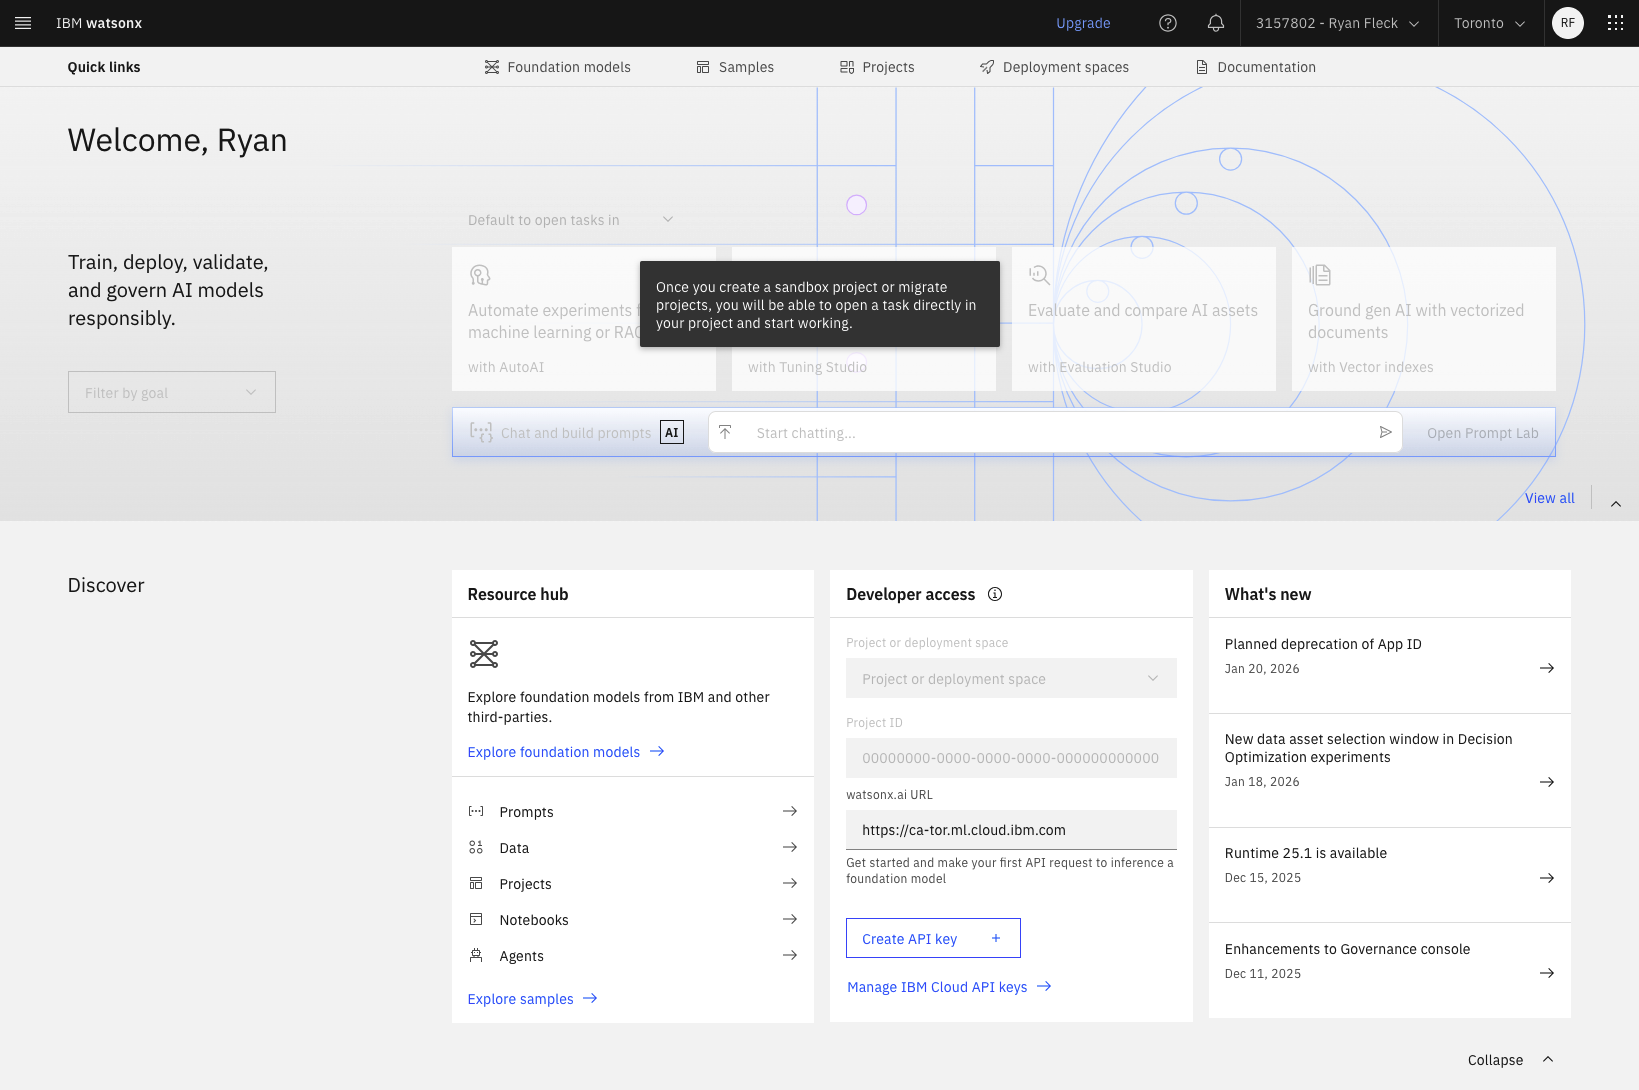
watsonx

At this point in the procedure, please store in a .env file:
WATSONX_PROJECT_ID= ... your-project-id ...
WATSONX_API_KEY=    ...  your-api-key   ...
Both of these environment variables will be needed when we start to use the APIs.

Important: If you want a bearer token to try these requests you can fetch one with your API key. When reaching out to IBM Cloud, an API key is not the same as a bearer token, and none of your requests over CURL will not authenticate without one.
# Send a POST to IBM Cloud Identity Services
curl -X POST \
--url https://iam.cloud.ibm.com/identity/token \
--header "Content-Type: application/x-www-form-urlencoded" \
--data "grant_type=urn:ibm:params:oauth:grant-type:apikey&apikey=H32HqTYgF-_h47Lx7..."

# Returned Data
{"access_token":"joiUnlhbiIsImZhbWlseV9uYW1lIjoiRmxlY2siLCJuYW1lIjoiUnlhbiBGbGVjayI...",
 "refresh_token":"not_supported","ims_user_id":14985410,"token_type":"Bearer",
 "expires_in":3600,"expiration":1770785909,"scope":"ibm openid"}
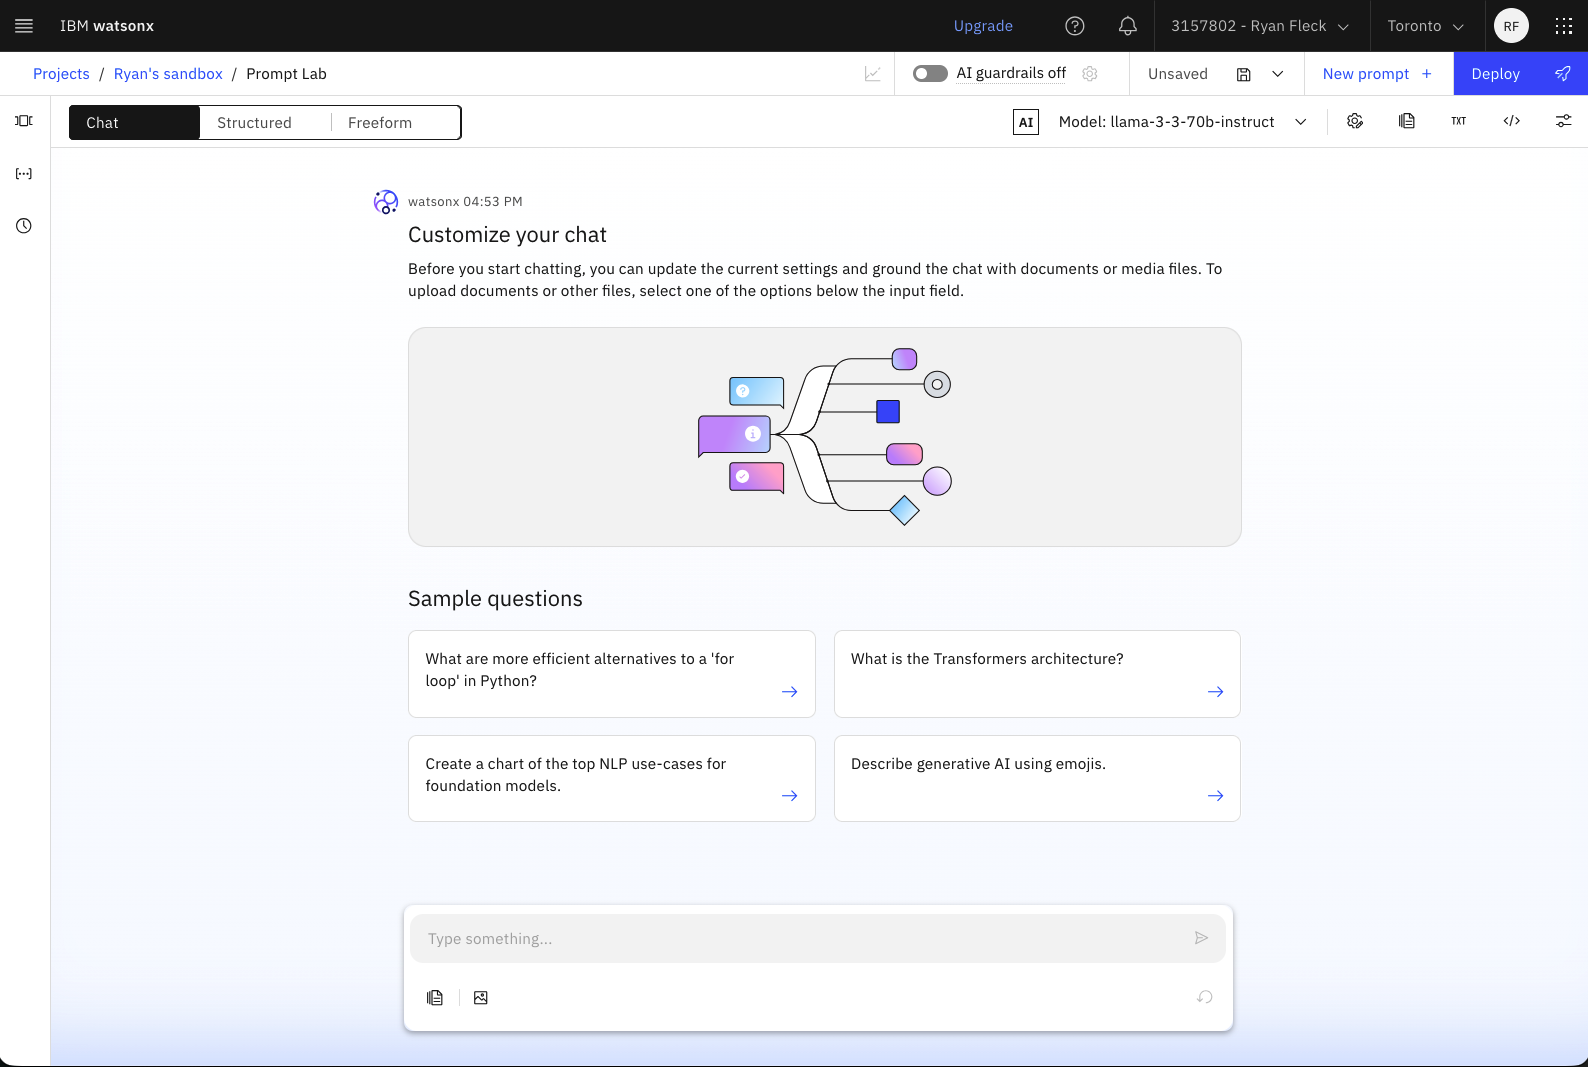
With the access_token returned by this request, you should be able
to successfully use the code examples provided in the Prompt Lab.
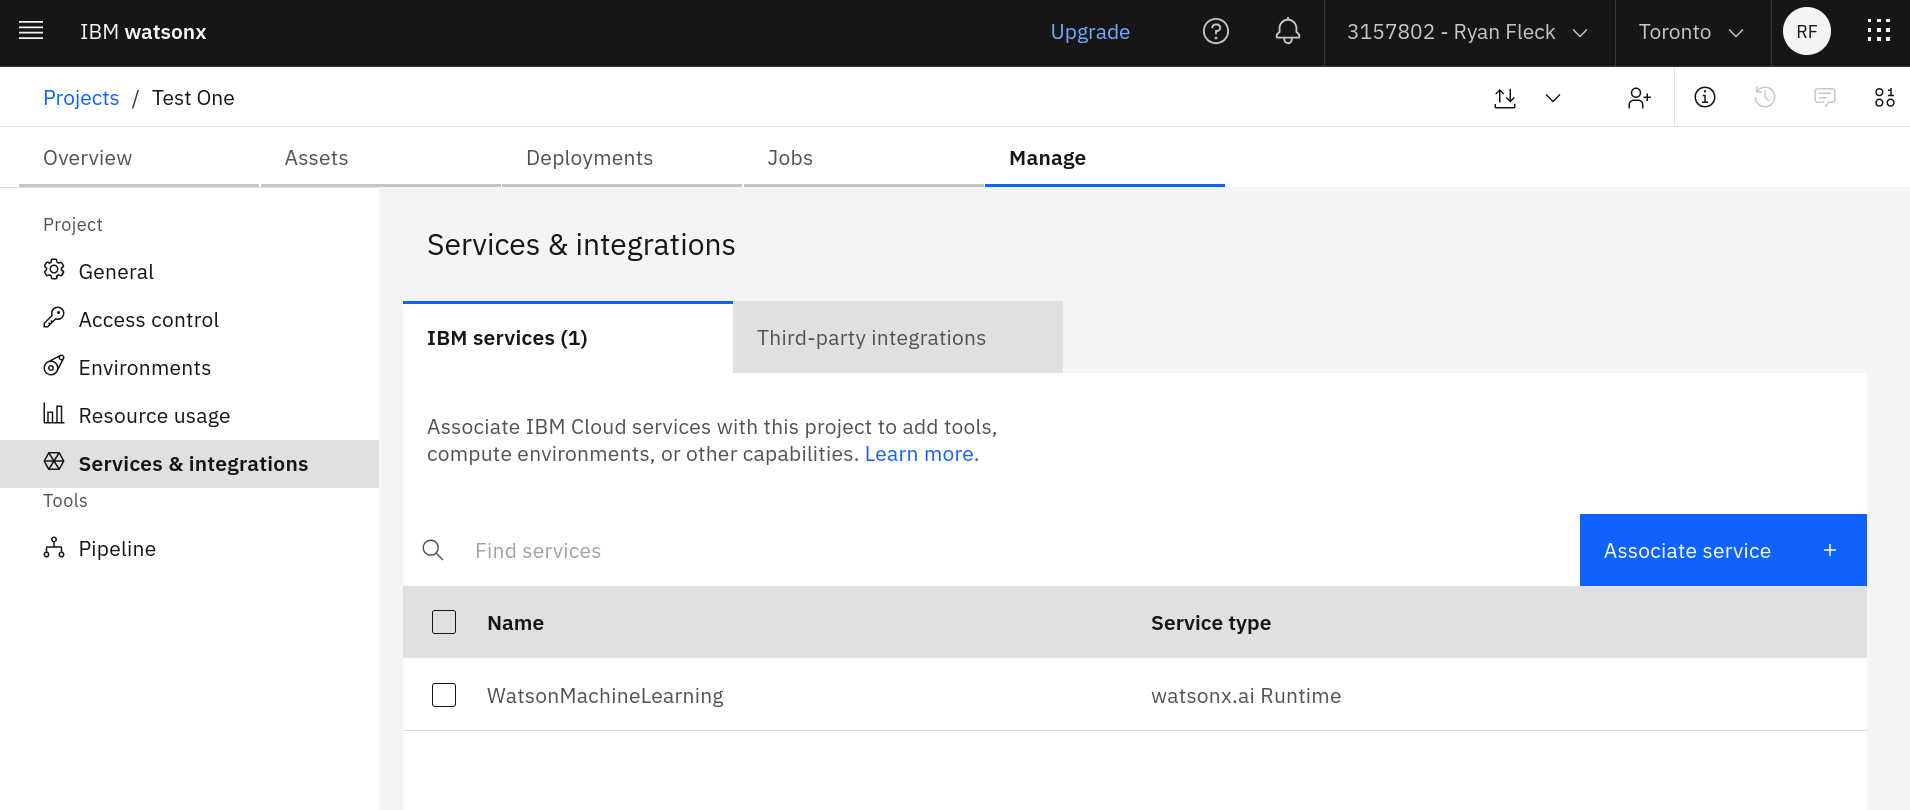
If it isn’t done automatically, associate a runtime with your project:
When working, you can check your consumed tokens in your project:

…if this is complete, we are ready to start programming!
Up And Running With Python & LangChain
Having tested a few methods, using the LangChain extension is the simplest method, as it does not require fetching additional credentials.
Step 1: Environment Set Up
Python: First, set up a basic Python 3.11+ environment:
# Set up the project folder and virtual environment
mkdir ~/Documents/watsonx
cd ~/Documents/watsonx
touch main.py requirements.txt .env
python -m venv .venv
source .venv/bin/activate
Dependencies: Add these libraries to the requirements.txt file:
langchain_classic
langchain_ibm
langchain_ollama
python-dotenv
requests
Then run pip to install the dependencies:
pip install -r requirements.txt
Secrets: Write these two environment variables to the .env file:
WATSONX_PROJECT_ID=de4703b9-368... (use your own project id)
WATSONX_API_KEY=lh81abYsZkBebuL... (use your own api key)
Our python environment is now ready to use!
Step 2: Call watsonx Models
Open a blank Python file in your favourite editor and add the following:
from langchain_ibm import ChatWatsonx
from ibm_watsonx_ai.foundation_models.schema import TextChatParameters
from os import getenv
from dotenv import load_dotenv

# Pull in environment variables from the .env file
load_dotenv()
watsonx_project = getenv("WATSONX_PROJECT_ID")
watsonx_api_key = getenv("WATSONX_API_KEY")

# Set LLM parameters
parameters = TextChatParameters(
    top_p=0.9,
    temperature=0.5,
    max_completion_tokens=200,  # <- or however many your response may require
)

# Set up your model
# This object can be re-used many times to send requests
model = ChatWatsonx(
    model_id="meta-llama/llama-3-3-70b-instruct",
    url="https://ca-tor.ml.cloud.ibm.com",
    project_id=watsonx_project,
    params=parameters,
    apikey=watsonx_api_key,
)
Now, within another part of your program, you can call model.invoke to make a call:
res = model.invoke("Is this working?")
print(res.content)
# > Yes, this is working. I'm ready to assist you. What would you like to talk about or what question do you have?
Further, you can provide a conversational list as input:
system_prompt = """Welcome to CalgaryHacks 2026! Encourage the user
with their hack and provide them with great ideas."""

res = model.invoke(
    [
        ("system", system_prompt),
        ("user", "Can you suggest a great hack to impress the IBM judges?"),
    ]
)

# Entering this in the REPL will show the response object:
res.content
>>> AIMessage(content="CalgaryHacks 2026 is going to be an amazing event...",
              usage_metadata={'input_tokens': 71, 'output_tokens': 430, 'total_tokens': 501})
Away we go. You have what you need now to query an LLM!
Step 3: Set Up Tools
From the documentation at langchain.com/ … /ChatWatsonx
# Add this to the example above
from langchain_core.tools import tool

@tool
def exponentiate(x: float, y: float) -> float:
    """Raise 'x' to the 'y'."""
    return x**y

tool_model = model.bind_tools([exponentiate])
res = tool_model.invoke("What is 3 squared?")

# In res.tool_calls, we can see this:
[{'name': 'exponentiate', 'args': {'x': '3', 'y': '2'},
  'id': 'chatcmpl-tool-7a8761b224274843aad3bcdac49c6273',
  'type': 'tool_call'}]
Manually call these functions, or create an Agent in the next section to call the functions and use the responses automatically.
Step 4: Set Up An Agent
From blog.langchain.com/tool-calling-with-langchain/
# Add this to the example above
from langchain_classic.agents import create_tool_calling_agent, AgentExecutor
from langchain_core.prompts import ChatPromptTemplate

prompt = ChatPromptTemplate.from_messages([
    ("system", "you're a helpful assistant"),
    ("human", "{input}"),
    ("placeholder", "{agent_scratchpad}"),
])

agent = create_tool_calling_agent(model, tools, prompt)
agent_executor = AgentExecutor(agent=agent, tools=tools, verbose=True)

agent_executor.invoke({"input": "what's 2 to the power of 8?", })
Executing this code outputs the following response in the console:
> Entering new AgentExecutor chain...

Invoking: `exponentiate` with `{'x': 2, 'y': 8}`

256.0

The function call `{"name": "exponentiate", "parameters": {"x": 2, "y": 8}}`
  calculates 2 to the power of 8, which equals 256.0.

> Finished chain.
Step 5: Full Example
Here’s the combined, finished product showcasing what we’ve just built - a method for querying IBM’s foundation models in an agentic manner, with the ability to call local functions!
from langchain_ibm import ChatWatsonx
from ibm_watsonx_ai.foundation_models.schema import TextChatParameters
from os import getenv
from dotenv import load_dotenv
from langchain_core.tools import tool
from langchain_classic.agents import create_tool_calling_agent, AgentExecutor
from langchain_core.prompts import ChatPromptTemplate

# Pull in environment variables from the .env file
load_dotenv()
watsonx_project = getenv("WATSONX_PROJECT_ID")
watsonx_api_key = getenv("WATSONX_API_KEY")

# Model - Set up your foundation model with some parameters
# =========================================================

parameters = TextChatParameters(
    top_p=0.9,
    temperature=0.5,
    max_completion_tokens=200,  # <- or however many your response may require
)

model = ChatWatsonx(
    model_id="meta-llama/llama-3-3-70b-instruct",
    url="https://ca-tor.ml.cloud.ibm.com",
    project_id=watsonx_project,
    params=parameters,
    apikey=watsonx_api_key,
)

# Tools - define functions for your LLM to call:
# ==============================================


@tool
def exponentiate(x: float, y: float) -> float:
    """Raise the number 'x' to the 'y' exponent number."""
    return x**y


@tool
def secret_algorithm(x: float) -> float:
    """Applies the secret algorithm to an input number 'x'."""
    return x + 2


tools = [exponentiate, secret_algorithm]

# Agent - Create a smart agent to execute these functions:
# ========================================================

system_prompt: str = """
You are a helpful step-by-step agentic assistant.

Rules:
- ALWAYS call tools one at a time
- NEVER pass tool descriptions as arguments
- When a tool returns a result, use the numeric result in the next step

When solving problems:
1. Call one tool
2. Wait for the result
"""

prompt = ChatPromptTemplate.from_messages(
    [
        ("system", system_prompt),
        ("human", "{input}"),
        ("placeholder", "{agent_scratchpad}"),
    ]
)

# Assemble the agent with the model, tools, and prompt

agent = create_tool_calling_agent(model, tools, prompt)
agent_executor = AgentExecutor(agent=agent, tools=tools, verbose=True)

# Execute - Run your model and enjoy the results!
# ===============================================

res = agent_executor.invoke(
    {
        "input": "First, multiply 2 to the power of 8. Run the result through the secret algorithm twice.",
    }
)
Executing the code above results in this output:
> Entering new AgentExecutor chain...

Invoking: `exponentiate` with `{'x': '2', 'y': '8'}`


256.0
Invoking: `secret_algorithm` with `{'x': '256.0'}`


258.0
Invoking: `secret_algorithm` with `{'x': '258.0'}`


260.0
The final result is 260.0.

> Finished chain.
Step 6: Use a Local Model
IBM Granite models are designed with enhanced instruction following and tool calling capabilities, making them excellent for agentic workflows. Check out the model card on Ollama’s site at ibm/granite4 .
First, install Ollama
and pull
granite4:350m. This granite model should be small enough to
run on 8th gen Intel mobile processors at a decent speed.
ollama pull granite4:350m
After that, using the local model is super easy - replace the ‘model’ instantiation above with these lines:
from langchain_ollama import ChatOllama

model = ChatOllama(model="granite4:350m", temperature=0)
While excellent for simple tasks, do not expect the performance or speed of cloud models, especially when running on CPU. You will need to adapt the prompt for the smaller model - this one worked well for me and was able to arrive at the correct answer of “258” to the proposed problem:
system_prompt: str = """
You are a helpful step-by-step agentic tool-using assistant.

Rules:
- Execute tools one at a time.
- ALWAYS explain how you will solve each step before you make a tool call.
- NEVER pass tool descriptions as arguments.
- Be very smart about the input you use for each tool call.
- ALWAYS explain why you chose your inputs.

When solving problems:
1. Call one tool
2. Wait for the result

Solve the user prompt below one step at a time, sending back a tool
call response after you have given a solution for each step.
"""
Workshop Part II: Application
My colleague @s-sajid has put together an additional demo and repository to present. The repository is hosted on GitHub:
github.com/s-sajid/calgaryhacks2026-ibm-workshop

watsonx Documentation
With a free-tier IBM Cloud account you can immediately jump into the implementation phase with the REST API and your favourite programming language. SDKs for Python and Node.js are provided.
Getting Started
Python API
Python LangChain API
Node.js API
JavaScript Langchain API
HTTP API
Sample Projects + Source Code
More watsonx Advice
Query Available Foundation Models
If you would like to know what models you can use, hit the specs endpoint:
import requests
from pprint import pprint

url = "https://ca-tor.ml.cloud.ibm.com/ml/v1/foundation_model_specs?version=2024-10-10&filters=function_text_chat"
data = requests.get(url).json()
pprint(data)

# Print the labels
for model in data["resources"]:
    print(model["model_id"])
This prints the following model IDs to the console:
ibm/granite-3-8b-instruct
meta-llama/llama-3-2-11b-vision-instruct
meta-llama/llama-3-3-70b-instruct
mistralai/mistral-small-3-1-24b-instruct-2503
IBM watsonx API
import getpass
from ibm_watsonx_ai import Credentials
from ibm_watsonx_ai.foundation_models import ModelInference

credentials = Credentials(
    url="https://ca-tor.ml.cloud.ibm.com",
    api_key="AsMfOYtnsCPwx-goBgC3PWxH32HqTYgF-_h47Lx7ODw_"
)

project_id = "f9bd5772-7a15-44f1-bdf4-c74fb73d299c"
model_id = 'mistralai/mistral-small-3-1-24b-instruct-2503'

from ibm_watsonx_ai.foundation_models.schema import TextChatParameters
TextChatParameters.show()

model = ModelInference(
    model_id=model_id, credentials=credentials, project_id=project_id, params=params
)

messages = [{"role": "user", "content": "What is 1 + 1"}]

simple_chat_response = model.chat(messages=messages)
>>> simple_chat_response["choices"][0]["message"]["content"]
The sum of 1 + 1 is:

2

Here it is:

 1
+1
----
 2
Generate Bearer Tokens for Programmatic Access
$ curl -X POST \
--url https://iam.cloud.ibm.com/identity/token \
--header "Content-Type: application/x-www-form-urlencoded" \
--data "grant_type=urn:ibm:params:oauth:grant-type:apikey&apikey=H32HqTYgF-_h47Lx7..."

{"access_token":"joiUnlhbiIsImZhbWlseV9uYW1lIjoiRmxlY2siLCJuYW1lIjoiUnlhbiBGbGVjayIsImVtYWl...",
 "refresh_token":"not_supported","ims_user_id":14985410,"token_type":"Bearer",
 "expires_in":3600,"expiration":1770785909,"scope":"ibm openid"}
REST API with Node.js
// No libraries required! Just REST.

const generateText = async () => {
  const url = "https://ca-tor.ml.cloud.ibm.com/ml/v1/text/chat?version=2023-05-29";
  const headers = {
    "Accept": "application/json",
    "Content-Type": "application/json",
    // You'll need to replace my Bearer Token here (disabled) with your own
    "Authorization": "Bearer 0XQQIn7orw7iwSe_uev..."
  };
  const body = {
    messages: [
      {
	role: "system",
	content: "You are Mixtral Chat, an AI language model developed by Mistral AI. You are a cautious assistant. You carefully follow instructions. You are helpful and harmless and you follow ethical guidelines and promote positive behavior."
      }
    ],
    project_id: "cfd94fb5-7b1d-41df-b790-de40816d68f0",
    model_id: "mistralai/mistral-small-3-1-24b-instruct-2503",
    frequency_penalty: 0,
    max_tokens: 2000,
    presence_penalty: 0,
    temperature: 0,
    top_p: 1,
    seed: null,
    stop: []
  };

  const response = await fetch(url, {
    headers,
    method: "POST",
    body: JSON.stringify(body)
  });

  if (!response.ok) {
    throw new Error("Non-200 response");
  }

  return await response.json();
}
await generateText()
Check Remaining Dollar-Credits
You can check https://cloud.ibm.com/billing/promotions to see your remaing credit. Using the promotional credit would be an excellent way to pay for and run a containerized service for your hackathon submission!
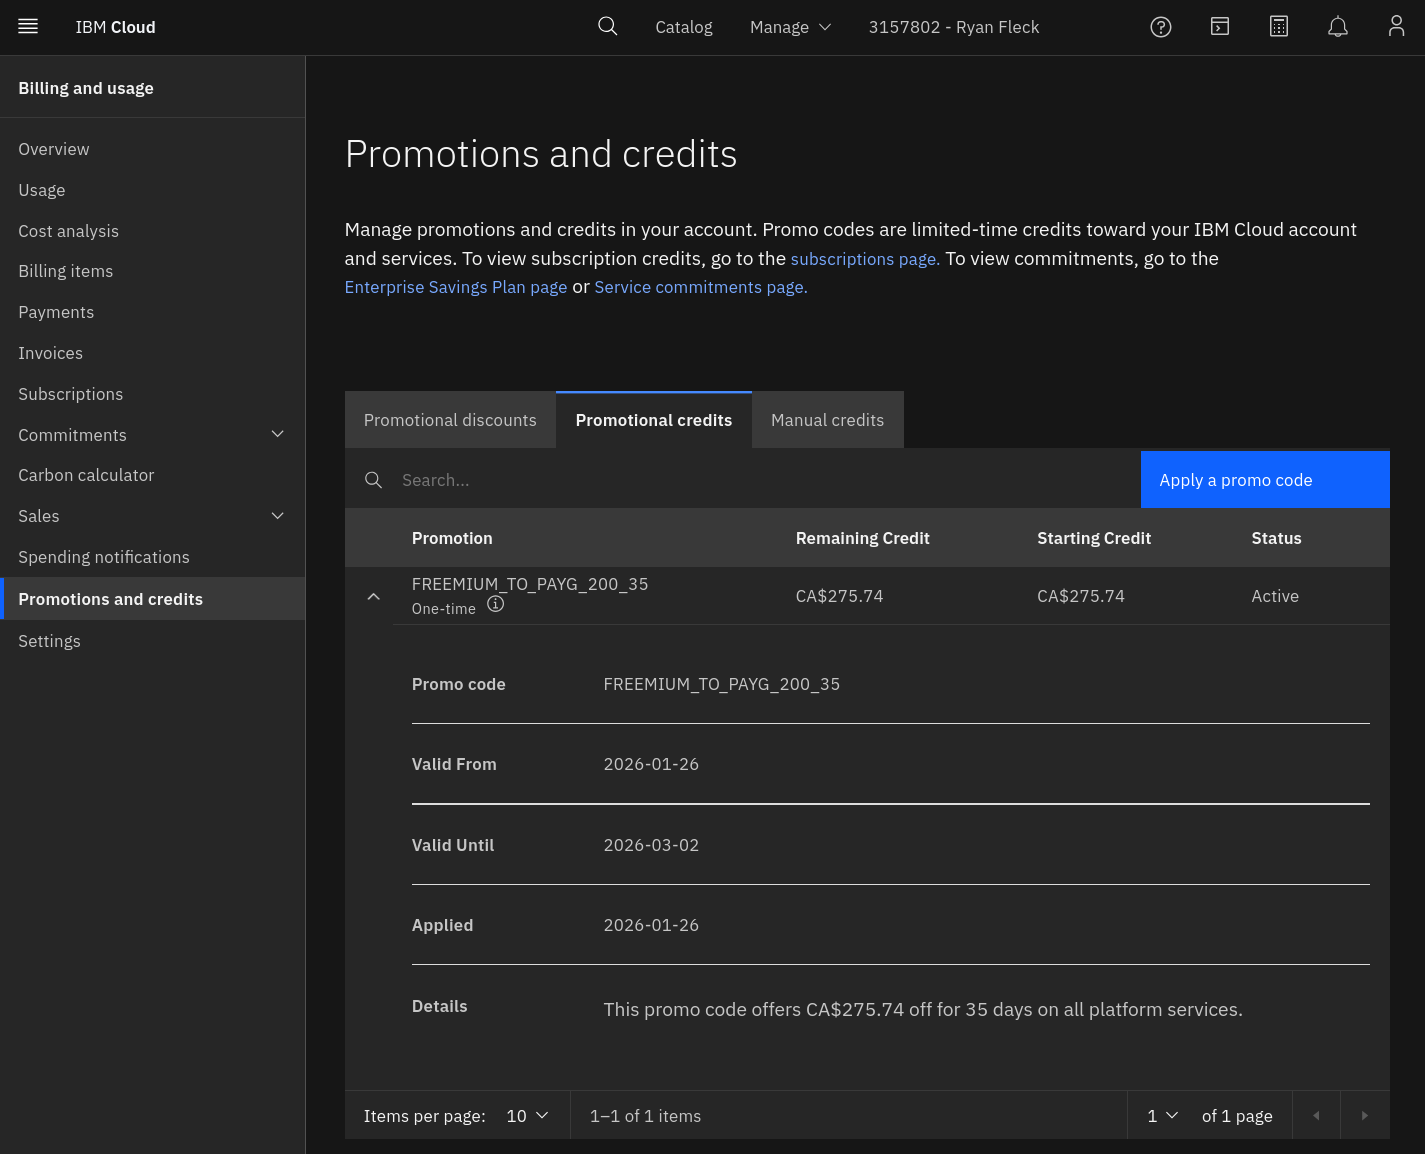
If you are worried about spending real money, set the spending notifications
in your account to $1.00 and enable both.
Parting Thoughts
Good luck!
Back in 2021 at uOttaHack I ran a tone analysis workshop - it’s funny how history echoes. Unfortunately the tone analysis endpoint no longer exists, but all of the database offerings from that time are still around.